- LinuxCNC
- LinuxCNC Documents
- Installing Linuxcnc from source and how to build special version ( git clone )
Installing Linuxcnc from source and how to build special version ( git clone )
01 May 2018 21:17 - 03 May 2018 13:26 #109943
by Grotius
Installing Linuxcnc from source and how to build special version ( git clone ) was created by Grotius
This document show's how to instal linuxcnc and how to install different distribution's of linuxcnc.
1. Check if git is installed
2. Think about how you would call your new linuxcnc directory.
3. Download linuxcnc and make install
4. Choose your new linuxcnc version to install
5. Configure your currenlty used kernel or installation, do you want to use linuxcnc
real time on a production machine?
6. Install build dependecies, if necessery.
7. Configure linuxcnc automatic for your current setup
8. Installing / Compiling your own linuxcnc version from source code
9. Rip environment
10.Run Linuxcnc
1. Check if git is installed
Git is a website that requires a software to clone linuxcnc from the git reprository (library).
Open terminal and type :
sudo apt-get install git
#### Picture install git ####
(linux knowledge comes sometimes between the lines : sudo is your admin privilege password)
2. Think about how you would call your new linuxcnc directory.
-- For example we call the new directory : linuxcnc-dev
3. Download linuxcnc
This would be your standard if it is your first linuxcnc installation on ubuntu, mint, etc.
Type in terminal :
git clone h*t*t*p*s://github.com/LinuxCNC/linuxcnc.git linuxcnc-dev
I would prefer to start with debian 9.... 64 bit. Very very good. www.linuxcnc.org/testing-stretch-rtpreempt/
For example is you want to change your directory name into "linuxcnc-test" you type :
Type in terminal :
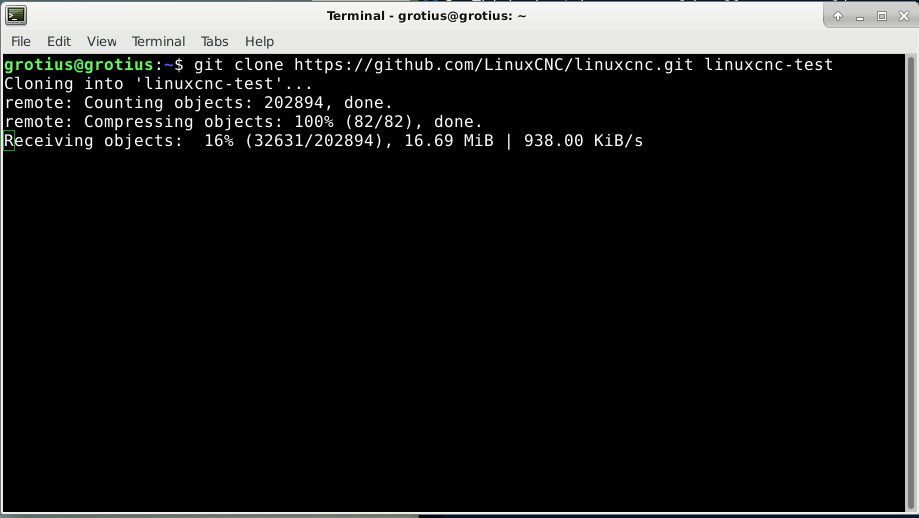
git clone h*t*t*p*s://github.com/LinuxCNC/linuxcnc.git linuxcnc-test
For exaple if you want to install linuxcnc in different directory, simple open the terminal in
that directory (target directory) by right mouseclick, you see option " open terminal here "
#### Picture clone process ####
4. Choose your new linuxcnc version to install
Open terminal in your home directory / target directory and type :
dir
(cd "target" or dir .. to go up or down in the directory three)
What you see is a list with the directory "linuxcnc-test" in my case
cd linuxcnc-test
#### Picture linuxcnc-test directory ####
The default install is the latest linuxcnc version 2.8 pre.... So if we don't change anything
it will automatic install the " master branche version " later.
Okey i will change to external offset branche in this example. If you don't want, goto 5.
Type in terminal :
git checkout dgarr/external_offsets
#### Picture git checkout ####
5. Configure
In your linuxcnc target directory cd to the debian directory :
you@you:~/linuxcnc-test/debian
Type :
./configure
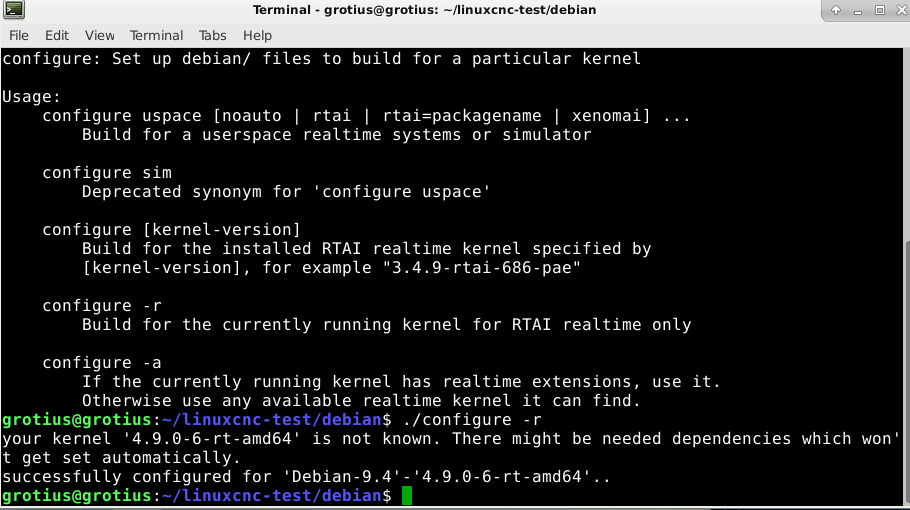
#### Picture configure kernel ####
Okey if you want to build linuxcnc for currently used kernel use -r so we type again with -r:
./configure -r
6. Install build dependecies, if necessery.
In your install directory place type :
dpkg-checkbuilddeps
What you see about rtai|rtai is no problem. If you need modules like :
python3, testitem, etc. just type :
sudo apt-get install python3 testitem
#### Picture build deps ####
7. Configure linuxcnc automatic for your current setup
cd src
./autogen.sh
./configure
#### picture make -j2 ####
8. Installing / compiling your own linuxcnc version from source code
next type :
make
If you have 4 core processor type : make -j4
If you have 12 core processor type : make -j12 (this is future doc)
After make proces, type :
sudo make setuid
#### picture sudo make setuid ####
9. Rip environment
If you have more then one version of linuxcnc running on 1pc. You want to select the version
you want to use. How to do that? The solution is type in the directory : scripts/
. ./rip-environment
linuxcnc
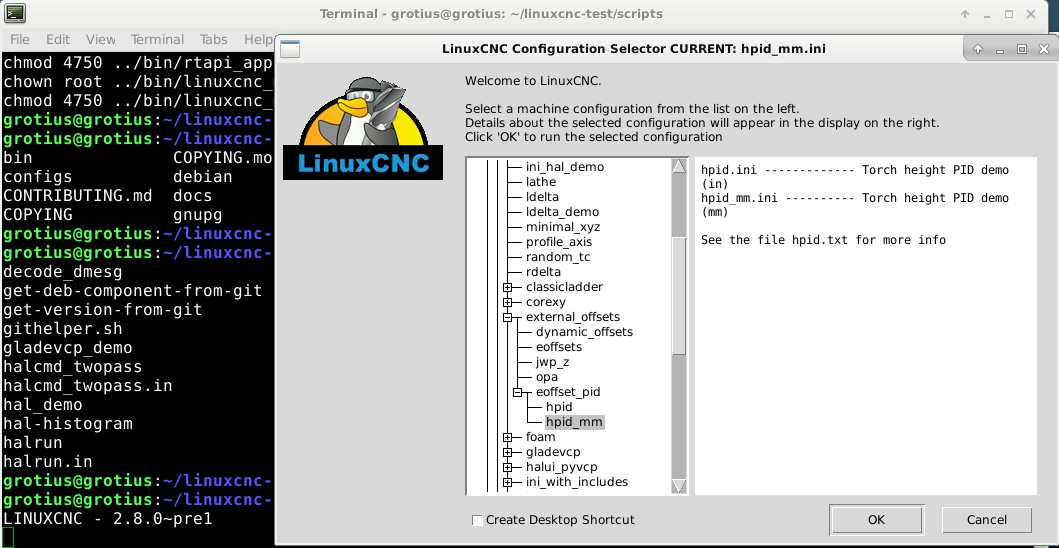
#### picture rip-environment ####
#### picture external offset linux startup ####
For info :
If you want to make a startup a program icon with admin privilige you have to add
before your command: gksudo
gksudo is a admin privelige for graphical user interface / sudo is for command line interface.
10. Run linuxcnc
Now you are ready for playing around with linuxcnc. Have fun.
Type in terminal :
linuxcnc
It will start in basic your core linux version
If you want to start your special installed linuxversion goto item : 9 ==> scripts/ and type => . ./rip-environment.
Have fun. I hope i can help some one with this document !!
Sorry but this website can't handle all the related pictures.
1. Check if git is installed
2. Think about how you would call your new linuxcnc directory.
3. Download linuxcnc and make install
4. Choose your new linuxcnc version to install
5. Configure your currenlty used kernel or installation, do you want to use linuxcnc
real time on a production machine?
6. Install build dependecies, if necessery.
7. Configure linuxcnc automatic for your current setup
8. Installing / Compiling your own linuxcnc version from source code
9. Rip environment
10.Run Linuxcnc
1. Check if git is installed
Git is a website that requires a software to clone linuxcnc from the git reprository (library).
Open terminal and type :
sudo apt-get install git
#### Picture install git ####
(linux knowledge comes sometimes between the lines : sudo is your admin privilege password)
2. Think about how you would call your new linuxcnc directory.
-- For example we call the new directory : linuxcnc-dev
3. Download linuxcnc
This would be your standard if it is your first linuxcnc installation on ubuntu, mint, etc.
Type in terminal :
git clone h*t*t*p*s://github.com/LinuxCNC/linuxcnc.git linuxcnc-dev
I would prefer to start with debian 9.... 64 bit. Very very good. www.linuxcnc.org/testing-stretch-rtpreempt/
For example is you want to change your directory name into "linuxcnc-test" you type :
Type in terminal :
git clone h*t*t*p*s://github.com/LinuxCNC/linuxcnc.git linuxcnc-test
For exaple if you want to install linuxcnc in different directory, simple open the terminal in
that directory (target directory) by right mouseclick, you see option " open terminal here "
#### Picture clone process ####
4. Choose your new linuxcnc version to install
Open terminal in your home directory / target directory and type :
dir
(cd "target" or dir .. to go up or down in the directory three)
What you see is a list with the directory "linuxcnc-test" in my case
cd linuxcnc-test
#### Picture linuxcnc-test directory ####
The default install is the latest linuxcnc version 2.8 pre.... So if we don't change anything
it will automatic install the " master branche version " later.
Okey i will change to external offset branche in this example. If you don't want, goto 5.
Type in terminal :
git checkout dgarr/external_offsets
#### Picture git checkout ####
5. Configure
In your linuxcnc target directory cd to the debian directory :
you@you:~/linuxcnc-test/debian
Type :
./configure
#### Picture configure kernel ####
Okey if you want to build linuxcnc for currently used kernel use -r so we type again with -r:
./configure -r
6. Install build dependecies, if necessery.
In your install directory place type :
dpkg-checkbuilddeps
What you see about rtai|rtai is no problem. If you need modules like :
python3, testitem, etc. just type :
sudo apt-get install python3 testitem
#### Picture build deps ####
7. Configure linuxcnc automatic for your current setup
cd src
./autogen.sh
./configure
#### picture make -j2 ####
8. Installing / compiling your own linuxcnc version from source code
next type :
make
If you have 4 core processor type : make -j4
If you have 12 core processor type : make -j12 (this is future doc)
After make proces, type :
sudo make setuid
#### picture sudo make setuid ####
9. Rip environment
If you have more then one version of linuxcnc running on 1pc. You want to select the version
you want to use. How to do that? The solution is type in the directory : scripts/
. ./rip-environment
linuxcnc
#### picture rip-environment ####
#### picture external offset linux startup ####
For info :
If you want to make a startup a program icon with admin privilige you have to add
before your command: gksudo
gksudo is a admin privelige for graphical user interface / sudo is for command line interface.
10. Run linuxcnc
Now you are ready for playing around with linuxcnc. Have fun.
Type in terminal :
linuxcnc
It will start in basic your core linux version
If you want to start your special installed linuxversion goto item : 9 ==> scripts/ and type => . ./rip-environment.
Have fun. I hope i can help some one with this document !!
Sorry but this website can't handle all the related pictures.
Last edit: 03 May 2018 13:26 by Grotius.
Please Log in or Create an account to join the conversation.
Moderators: HansU
- LinuxCNC
- LinuxCNC Documents
- Installing Linuxcnc from source and how to build special version ( git clone )
Time to create page: 0.142 seconds


