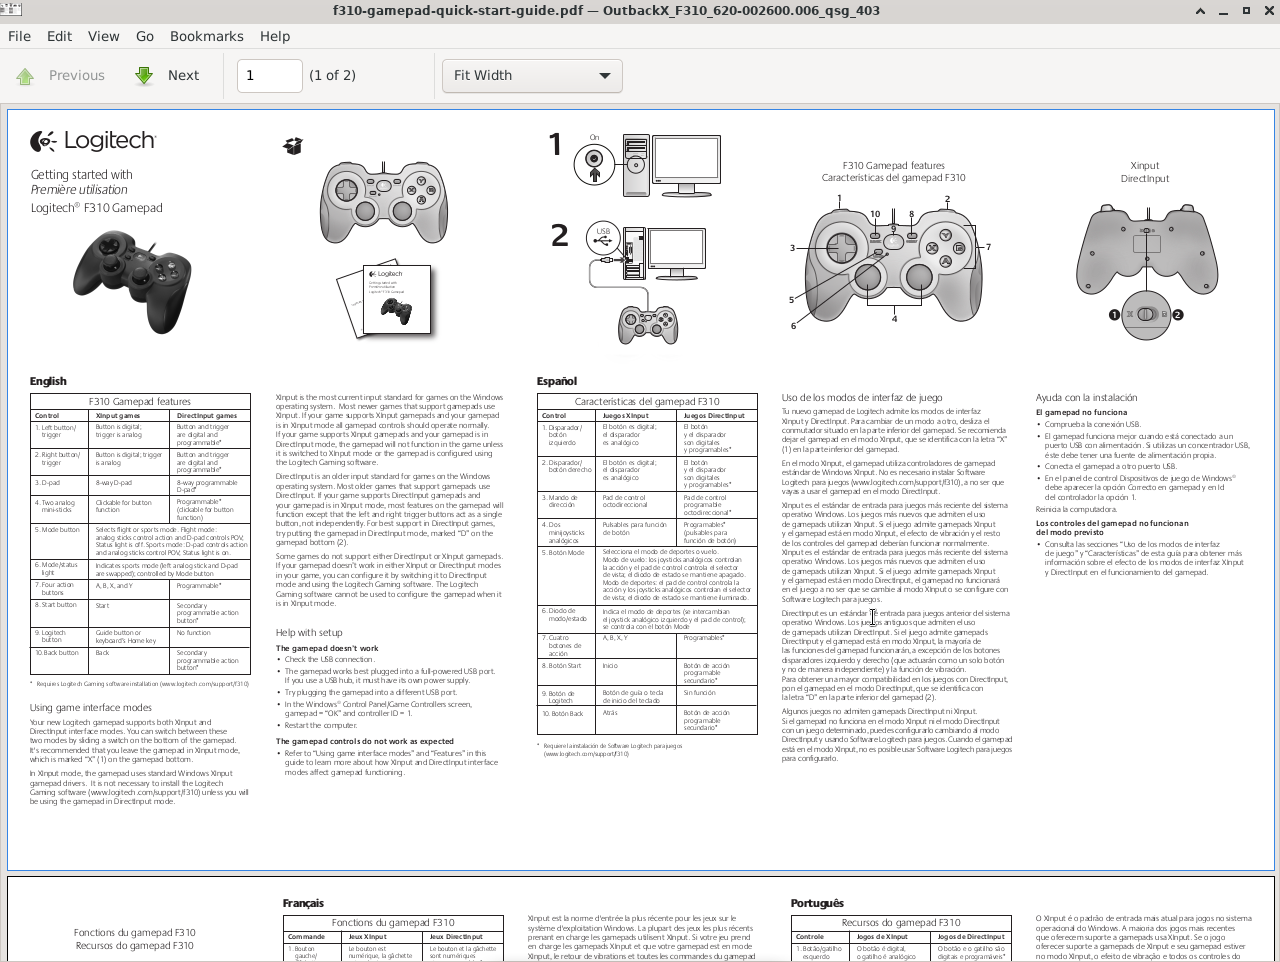
To get the Logitech Dual Action F310 controller to work as a Pendant for the Scorbot-ER-3 using LinuxCNC 2.9.2, after making previous changes mentioned earlier in this forum, do the following:
Open the "scorbot-er-3.hal" file in the /linuxcnc/configs/by_machine.scorbot-er-3/ folder and add these 2 lines (after the "loadrt differential" line);
loadusr -W hal_input -KRAL Logitech
loadrt mux16 names=jogspeed
then add (after the "addf differential.0 servo-thread" line):
addf jogspeed servo-thread
save and close the file.
next open the pyvcp.hal file and add the following (at the bottom):
#******************************
# connect miscellaneous signals
#******************************
# ---HALUI signals---
net axis-select-x halui.axis.x.select
net jog-x-pos halui.axis.x.plus
net jog-x-neg halui.axis.x.minus
net jog-x-analog halui.axis.x.analog
net x-is-homed halui.joint.0.is-homed
net axis-select-y halui.axis.y.select
net jog-y-pos halui.axis.y.plus
net jog-y-neg halui.axis.y.minus
net jog-y-analog halui.axis.y.analog
net y-is-homed halui.joint.1.is-homed
net axis-select-z halui.axis.z.select
net jog-z-pos halui.axis.z.plus
net jog-z-neg halui.axis.z.minus
net jog-z-analog halui.axis.z.analog
net z-is-homed halui.joint.2.is-homed
net axis-select-a halui.axis.a.select
net jog-a-pos halui.axis.a.plus
net jog-a-neg halui.axis.a.minus
net jog-a-analog halui.axis.a.analog
net a-is-homed halui.joint.3.is-homed
net axis-select-b halui.axis.b.select
net jog-b-pos halui.axis.b.plus
net jog-b-neg halui.axis.b.minus
net jog-b-analog halui.axis.b.analog
net b-is-homed halui.joint.4.is-homed
net jog-selected-pos halui.axis.selected.plus
net jog-selected-neg halui.axis.selected.minus
net spindle-manual-cw halui.spindle.0.forward
net spindle-manual-ccw halui.spindle.0.reverse
net spindle-manual-stop halui.spindle.0.stop
net machine-is-on halui.machine.is-on
net jog-speed halui.axis.jog-speed
net MDI-mode halui.mode.is-mdi
# ---USB device jog button signals---
# connect selectable mpg jog speeds
net jog-speed-a => jogspeed.sel0
net jog-speed-b => jogspeed.sel1
net jog-speed <= jogspeed.out-f
setp jogspeed.in00 150.000000
setp jogspeed.in01 300.000000
setp jogspeed.in02 600.000000
setp jogspeed.in03 1200.000000
net jog-speed-a <= input.0.btn-base
net jog-speed-b <= input.0.btn-base2
net jog-x-pos input.0.abs-hat0x-is-pos
net jog-x-neg input.0.abs-hat0x-is-neg
net jog-y-pos input.0.abs-hat0y-is-neg
net jog-y-neg input.0.abs-hat0y-is-pos
net jog-z-pos input.0.abs-rz-is-neg
net jog-z-neg input.0.abs-rz-is-pos
net jog-a-pos input.0.abs-y-is-neg
net jog-a-neg input.0.abs-y-is-pos
net jog-b-pos input.0.abs-x-is-pos
net jog-b-neg input.0.abs-x-is-neg
net Pgm-run <= halui.program.run <= input.0.btn-thumb
net Pgm-stop <= halui.program.stop <= input.0.btn-thumb2
net Pgm-pause <= halui.program.pause <= input.0.btn-top
net Pgm-resume <= halui.program.resume <= input.0.btn-trigger
net Pgm-step <= halui.program.step <= input.0.btn-base4
net Estop-activate <= halui.estop.activate <= input.0.btn-base3
save the file.
Special note: The Pendant will not work until you home the Scorbot-ER-3. After Homing the coordinates will change to cartesian coordinates (X,Y,Z,A,

. After you make these changes the pendant will work as follows:
The left joy stick controls X, and Y axis.
The right joy stick controls the Z axis.
The D-Pad controls the rotation and turning of the gripper A, and B axis.
The bottom finger triggers control the rate of movement;
nothing 150
left only 300
right only 600
both 1200
Last is the buttons:
Button 9 is estop, if pressed you have to use the keyboard to reset
Button 2 is run G-Code
Button 4 is pause program, press Button 1 to Resume
Button 3 Stop program if if press Button 2 it goes back to beginning and starts
over again
Button 10 you must first press Button 4 this will run the code one line at a time
Button 1 Resume (after Button 4, or Button 10)
I have not yet figured out how to open and close the gripper through the G-Code file or the Logitech F310 Pendant. Only the GUI interface (+ -) works for the gripper.
I hope someone smarter then me can help to figure this out, and add a replay.
Thank You all