Kuhlmann Engraver/mill retrofit Build log
- OHEngineering
-
 Topic Author
- Offline
- New Member
-

Less
More
- Posts: 3
- Thank you received: 1
01 Dec 2025 21:56 #339612
by OHEngineering
Kuhlmann Engraver/mill retrofit Build log was created by OHEngineering
Hi everyone!
I'm a long time lurker but first time poster.
I've been wanting to do something with LinuxCNC for a while now probalby 8-10 years. I've built/run several 3D printers as well as a Queenbee CNC Gantry router but using GRBL and ESTL controller has been way to simple to get up and running.
Meaning I've both been lazy and haven't really seen the need for using LinuxCNC.
I did plan on replacing the ESTL controller that is running the Queenbee router but it is working way to good for me to mess with it.
However!
An opportunity arose when I found a Kuhlmann mill on auction for next to nothing, probably since the controls where both partly missing and outdated, so i got it for an absolute steal, including service fees and tax it was less than 50 Eur.
So my plan is to retrofit it with LinuxCNC, convert it from steppers to Servos, and run both IO and servos on ethercat.
I figure I will use this a s a build log, I am also planning to film most of it but I have no idea of how quickly I can get any videos out.
It has been some time since I edited any video but I think it would be fun to get back to it again.
I hope to have updates here every other week or so, depending on life.
If you have any suggestions on hardware/config or any pitfalls to avoid, give me a heads up!
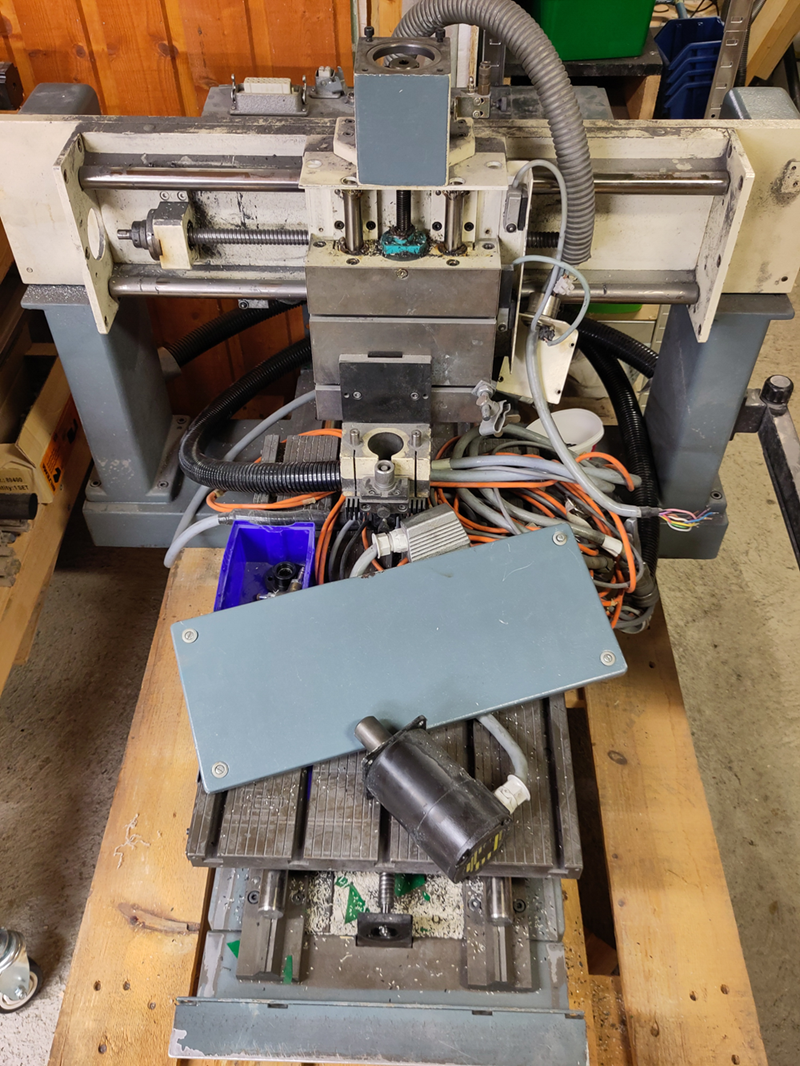
The mill as it looked when I picked it up. It looks like is has mostly been used for cutting plastics, based on the debris Iv'e cleaned from it so far.
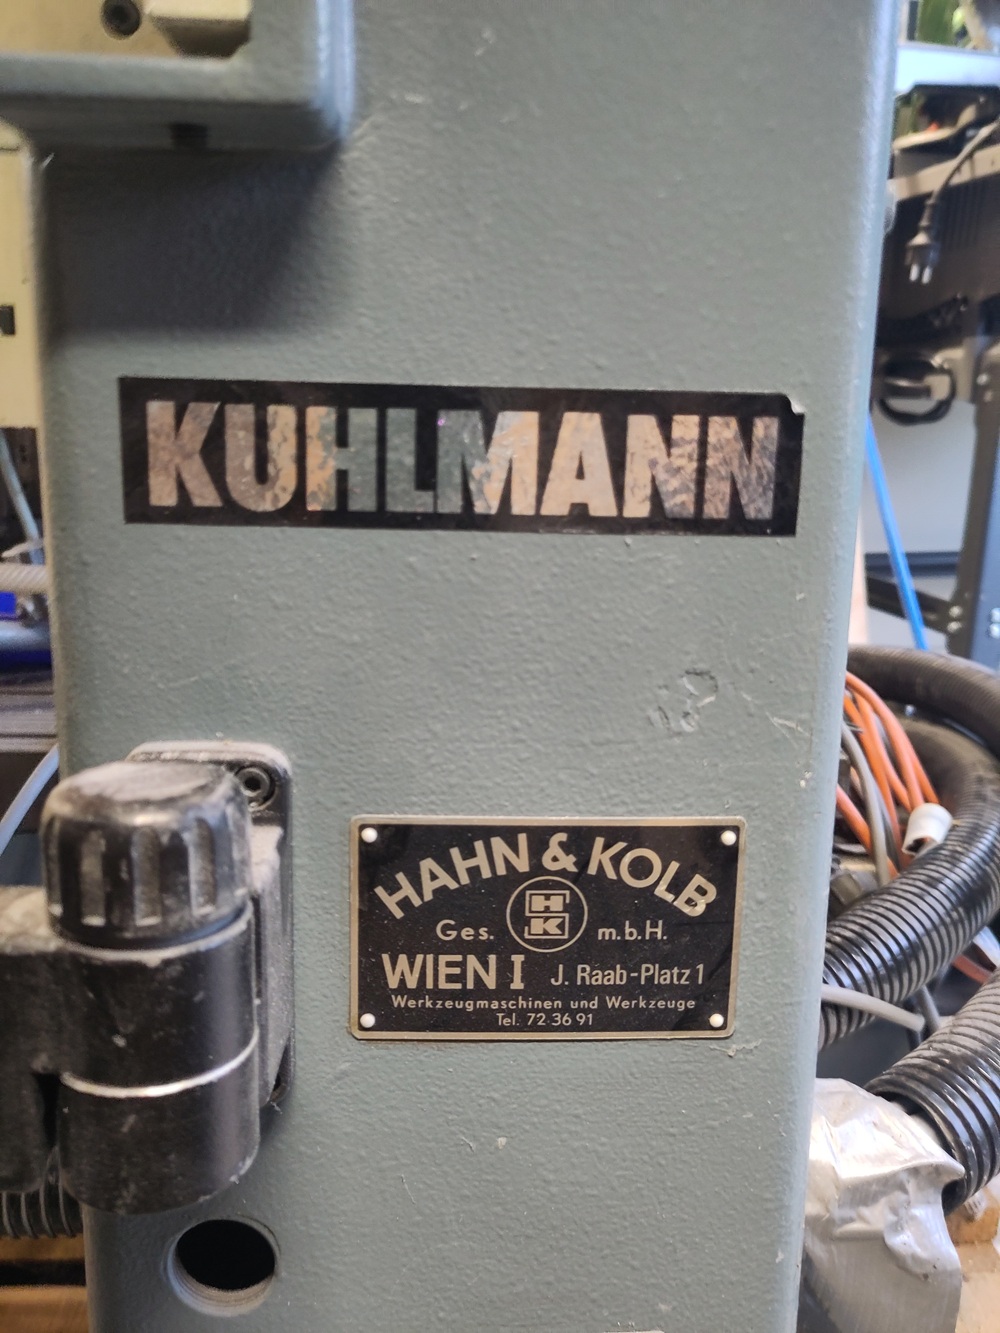
The manufacturer as well as the original seller of the machine
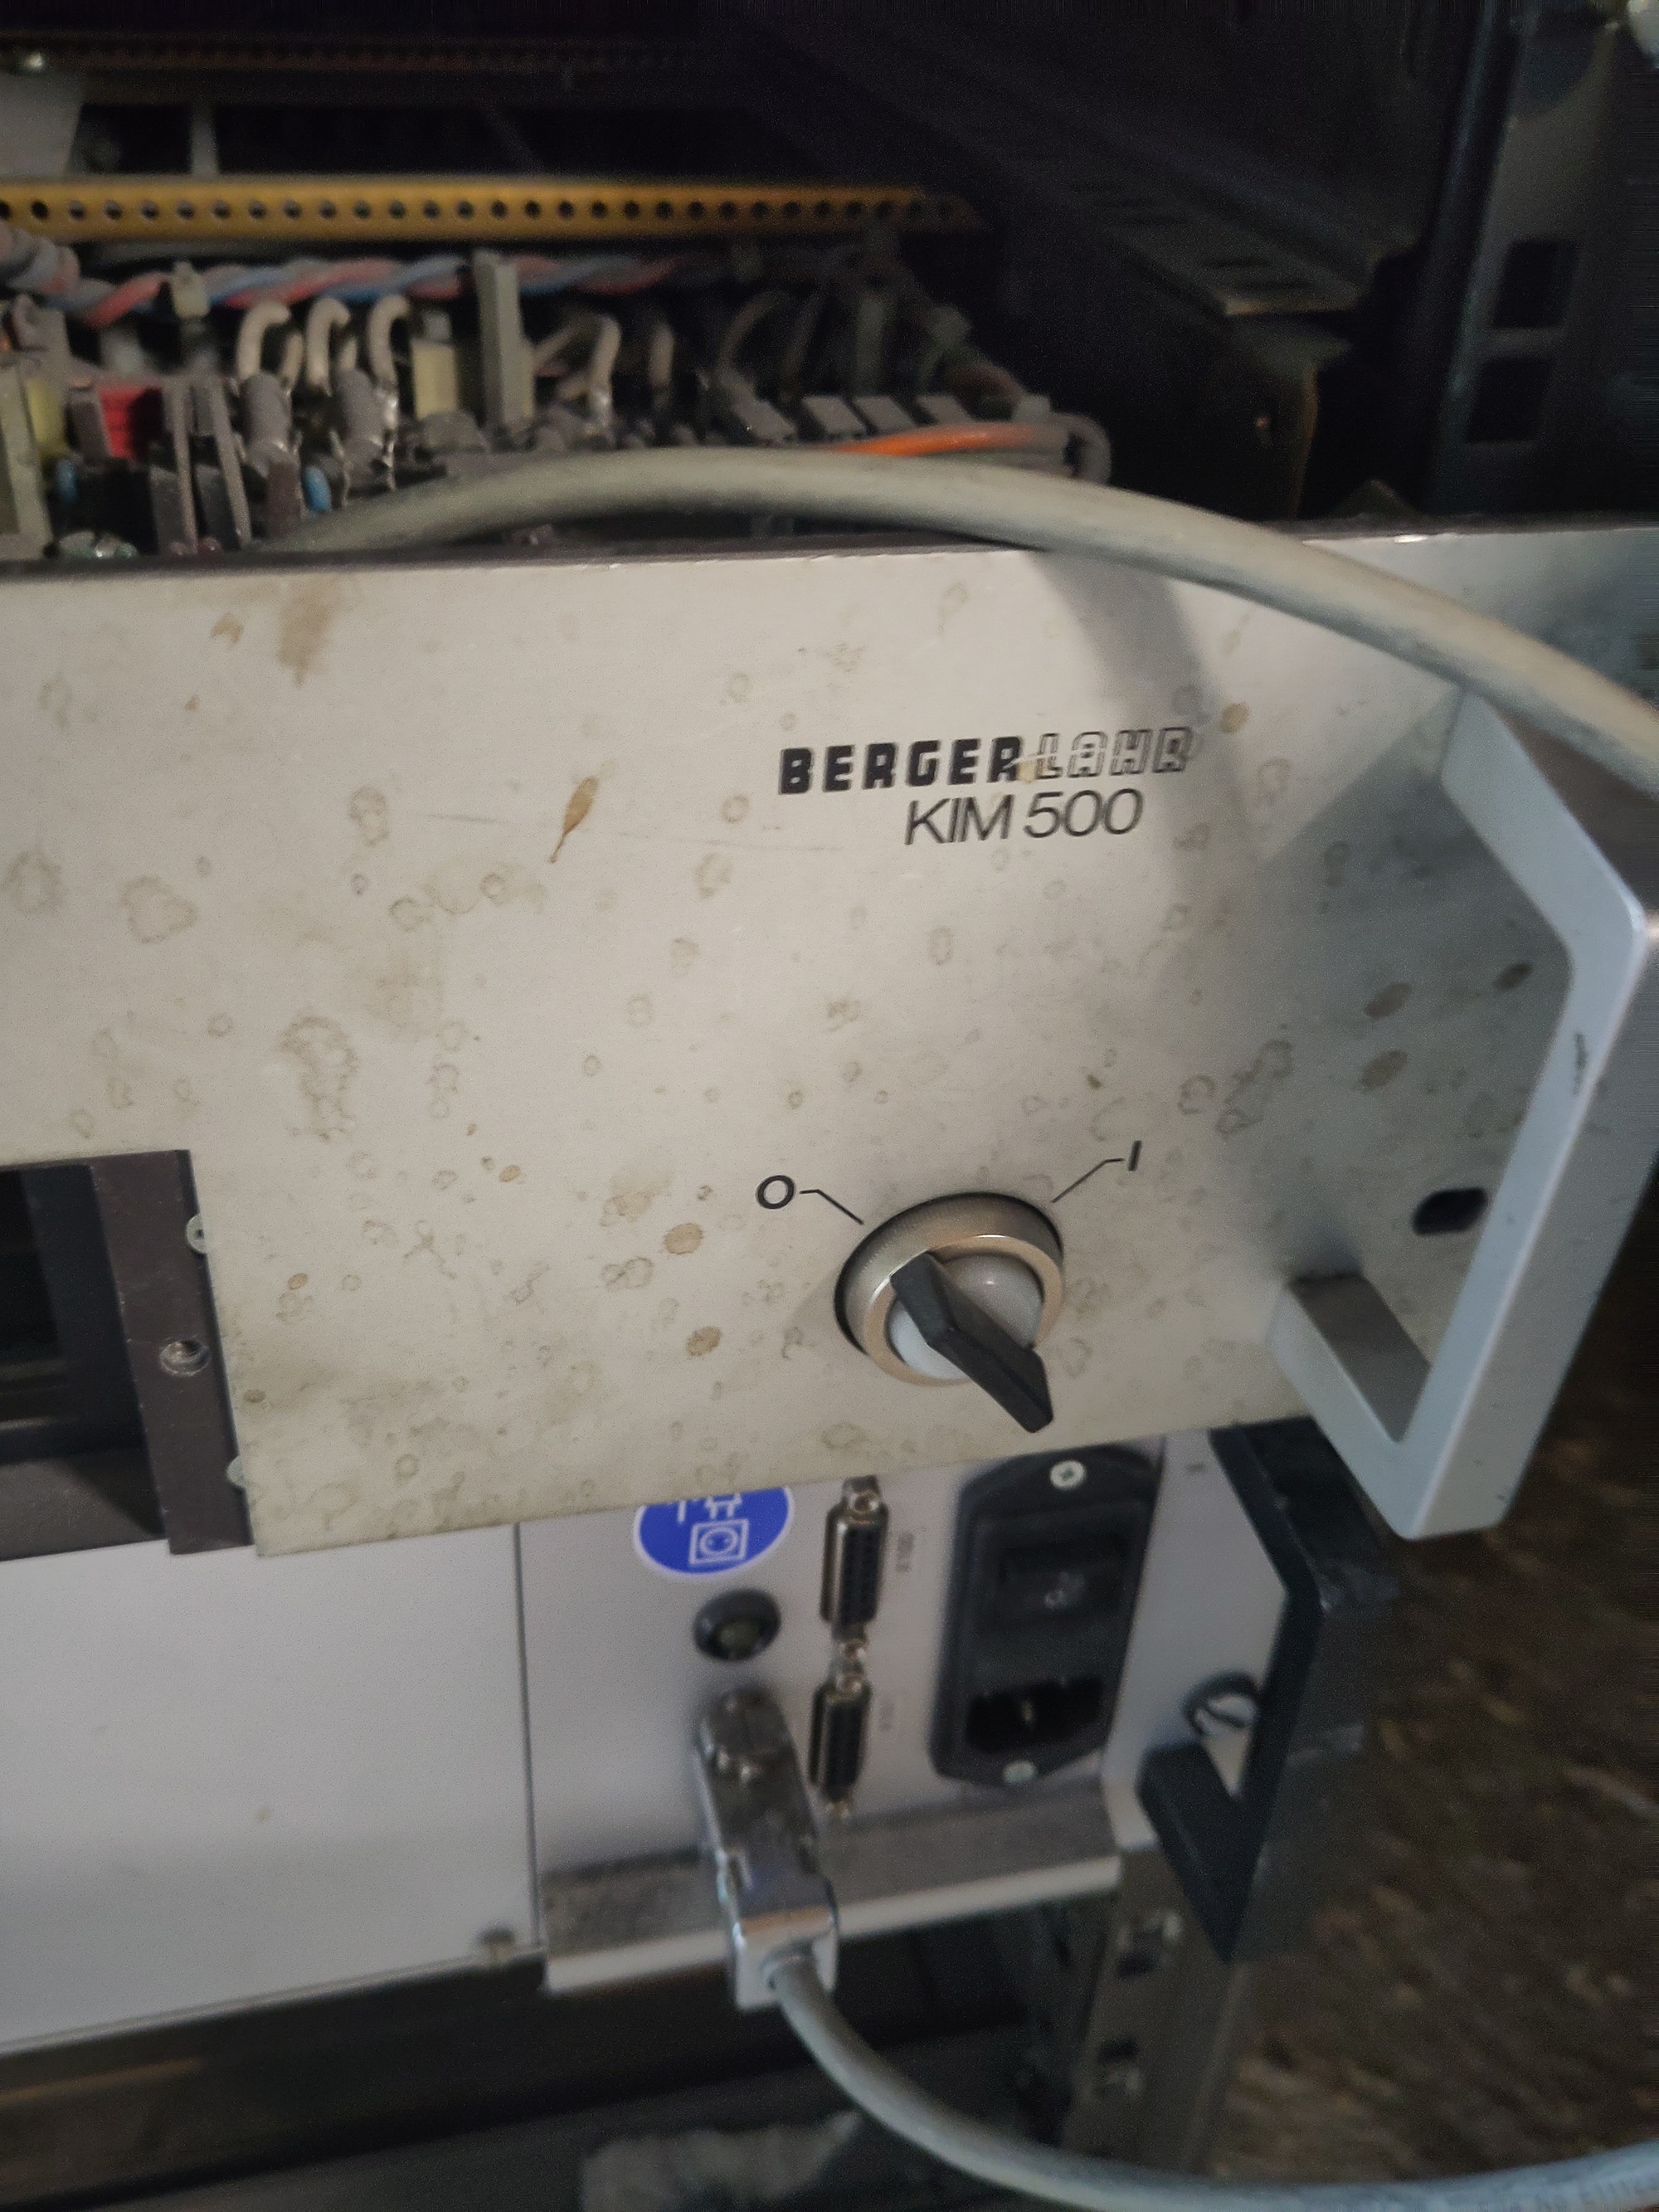
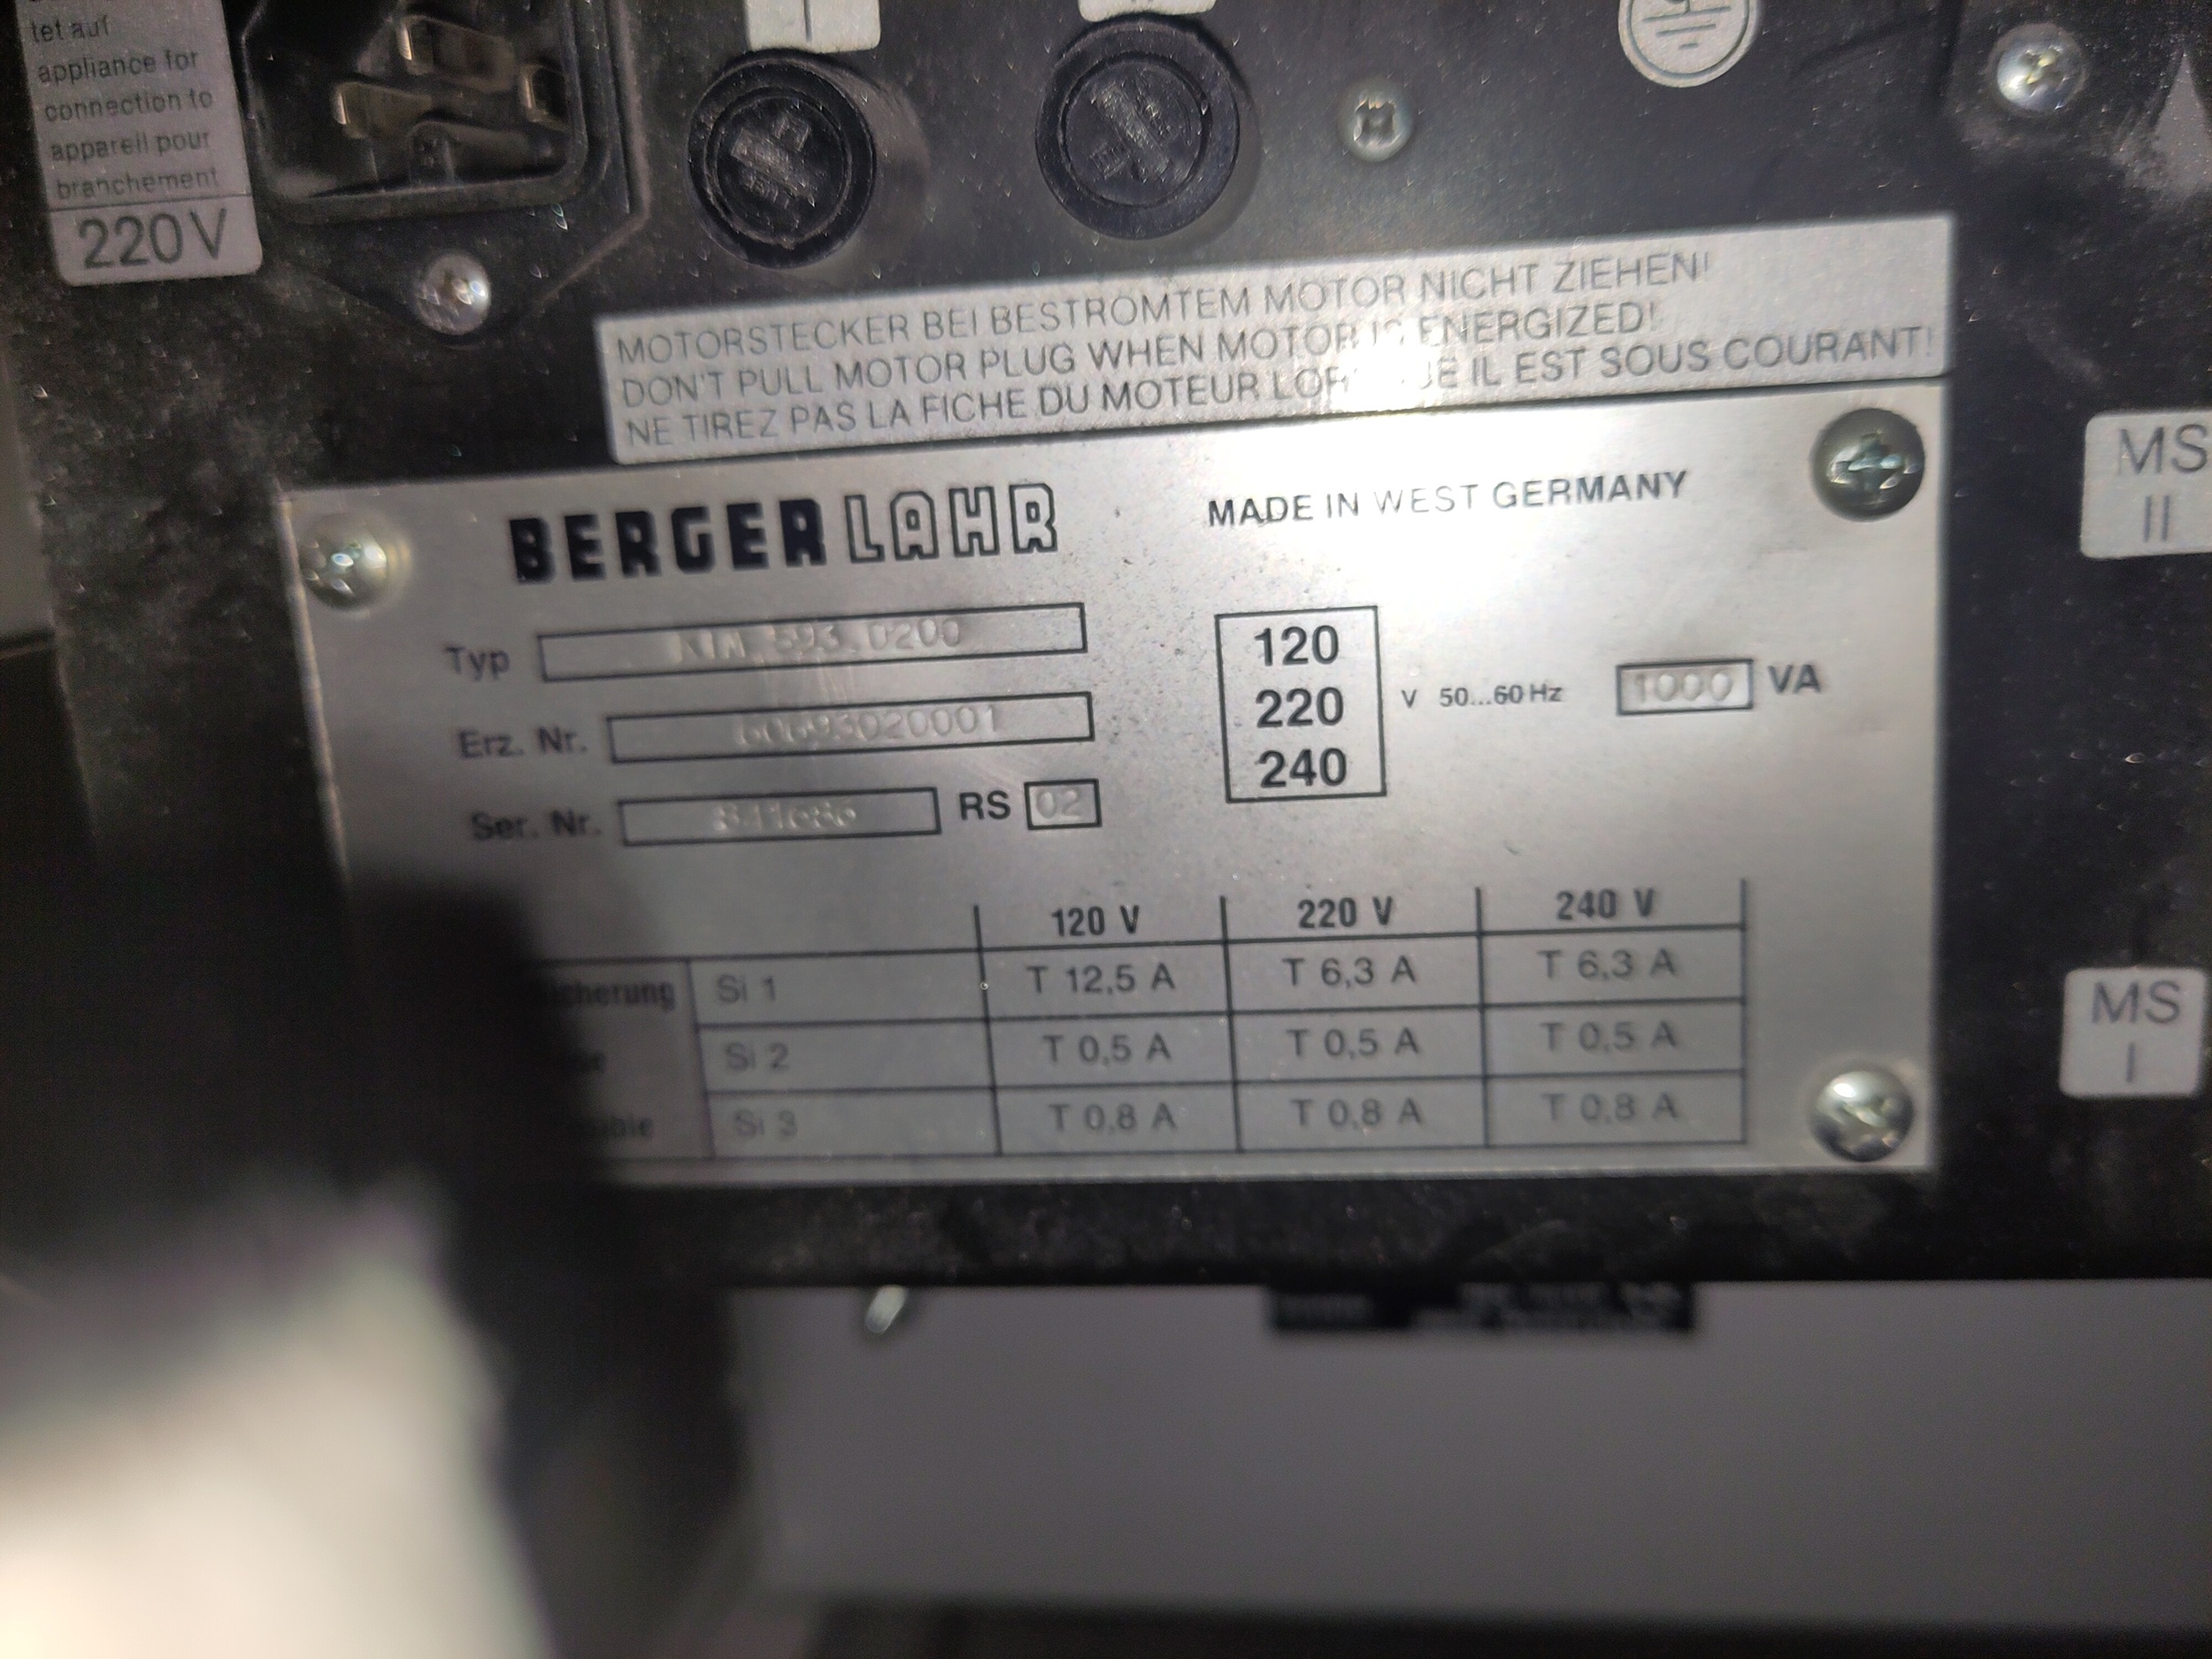
The extremely outdated control system, a Berger Lahr KIM500. I have not found much info about it and all the stepper drivers are missing, the shop I got it from had several other Kuhlmann mills so my guess is this one has been scavanged for parts.
Berger Lahr was bought by Schneider Electric ages ago, before the internet was really a thing so there is not much info out there on them at all.
It was set up to use 5 phase stepper motors, and IF i had been able to find any drivers I might have used the orginal motors to save some money but no one seems to supply generic drives for 5 phase steppers.
So wish me luck and we will see when I have any more updates.
I'm a long time lurker but first time poster.
I've been wanting to do something with LinuxCNC for a while now probalby 8-10 years. I've built/run several 3D printers as well as a Queenbee CNC Gantry router but using GRBL and ESTL controller has been way to simple to get up and running.
Meaning I've both been lazy and haven't really seen the need for using LinuxCNC.
I did plan on replacing the ESTL controller that is running the Queenbee router but it is working way to good for me to mess with it.
However!
An opportunity arose when I found a Kuhlmann mill on auction for next to nothing, probably since the controls where both partly missing and outdated, so i got it for an absolute steal, including service fees and tax it was less than 50 Eur.
So my plan is to retrofit it with LinuxCNC, convert it from steppers to Servos, and run both IO and servos on ethercat.
I figure I will use this a s a build log, I am also planning to film most of it but I have no idea of how quickly I can get any videos out.
It has been some time since I edited any video but I think it would be fun to get back to it again.
I hope to have updates here every other week or so, depending on life.
If you have any suggestions on hardware/config or any pitfalls to avoid, give me a heads up!
The mill as it looked when I picked it up. It looks like is has mostly been used for cutting plastics, based on the debris Iv'e cleaned from it so far.
The manufacturer as well as the original seller of the machine
The extremely outdated control system, a Berger Lahr KIM500. I have not found much info about it and all the stepper drivers are missing, the shop I got it from had several other Kuhlmann mills so my guess is this one has been scavanged for parts.
Berger Lahr was bought by Schneider Electric ages ago, before the internet was really a thing so there is not much info out there on them at all.
It was set up to use 5 phase stepper motors, and IF i had been able to find any drivers I might have used the orginal motors to save some money but no one seems to supply generic drives for 5 phase steppers.
So wish me luck and we will see when I have any more updates.
Please Log in or Create an account to join the conversation.
- tommylight
-

- Offline
- Moderator
-

Less
More
- Posts: 21718
- Thank you received: 7421
02 Dec 2025 05:58 #339623
by tommylight
Replied by tommylight on topic Kuhlmann Engraver/mill retrofit Build log
5 phase steppers are tough, i have plenty, i use none.
Get some cheap steppers and some really cheap drives like the TB6600 (that despite the name use TB67S109 chip inside), an old PC with a parallel port or a new-ish PC with a parallel port add on card, wire, install LinuxCNC and start making chips.
Later you can think about getting a Mesa board as it is much, much faster than parallel port, so you can use more microstepping on the drives and subsequently the machine will have less vibrations and move faster, but it is a mill so noise is not important.
Please Log in or Create an account to join the conversation.
- OHEngineering
-
Topic Author
- Offline
- New Member
-
Less
More
- Posts: 3
- Thank you received: 1
02 Dec 2025 11:47 #339637
by OHEngineering
Replied by OHEngineering on topic Kuhlmann Engraver/mill retrofit Build log
I've had a bunch of issues with the TB6600 drives, both missed steps and failed parts. Although they might have been knockoffs but still.
I've used the DM556 series exclusively since then with no issues.
But I've already done that, even if it have been with GRBL and ESTL instead of LinuxCNC.
I already have both the EtherCat servos and EtherCat IO so that is the way forward in this project.
I've used the DM556 series exclusively since then with no issues.
But I've already done that, even if it have been with GRBL and ESTL instead of LinuxCNC.
I already have both the EtherCat servos and EtherCat IO so that is the way forward in this project.
Please Log in or Create an account to join the conversation.
- OHEngineering
-
Topic Author
- Offline
- New Member
-
Less
More
- Posts: 3
- Thank you received: 1
21 Jan 2026 10:13 - 21 Jan 2026 10:35 #341638
by OHEngineering
Replied by OHEngineering on topic Kuhlmann Engraver/mill retrofit Build log
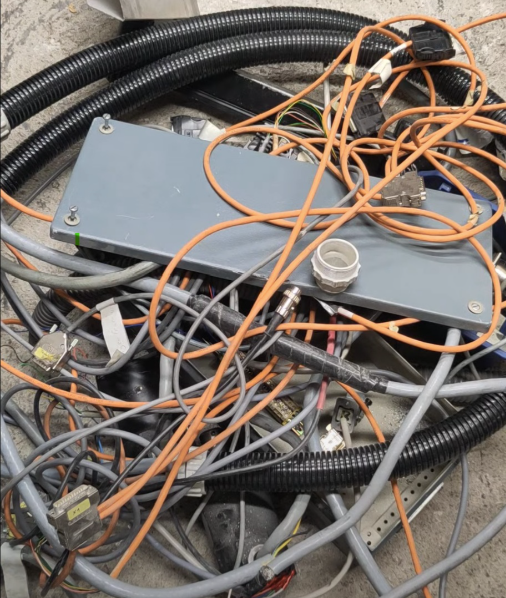
So it has been slightly more than 2 weeks, more like five or six because of reasons. But I have managed to make some progress over the holidays. The first step was obviously to clean up the entire machine, it might not have seen any serious use in a long time, if ever, but it was still in need of a serious cleaning.I started by removing all the cables and electrical parts from the machine since basically all of those will be replaced anyway.It turned into a neat little pile
After that I started cleaning the machine and even though I hadn’t really planned it I also pulled apart like 90% of the mechanics and cleaned all the parts individually.This was really necessary as I hadn’t been able to get all the plastic chips and old grease of any other way.
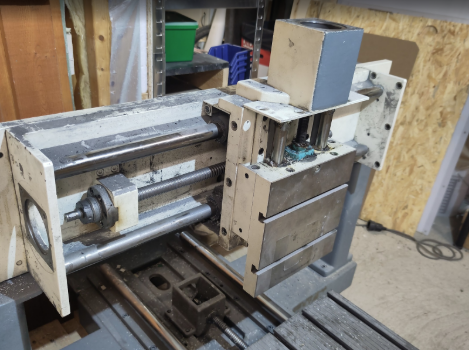
This included pulling apart, cleaning and re-greasing both the needle bearings for the ballscrews and the linear carriages. As far as I can tell all this hardware is still available, the bearings and what not, so it shouldn’t be an issue to service it if any parts give out in the future.


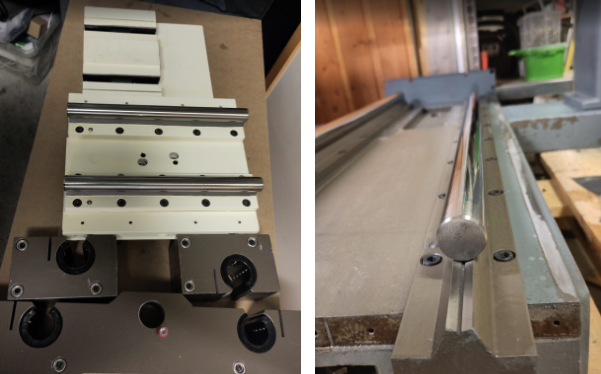
Just look at that before and after. Some of the balls didn’t circulate at all since the traces were so full of hardened grease, depending on the loading direction. I got all of them running again after first wiping them down with break-clean and then flushing them with penetrating oil to loosen and rinse out all the grease.I didn’t remove any of the supported rails so hopefully I haven’t caused any alignment issue. We’ll see when everything is back together, I will do a proper alignment check then.
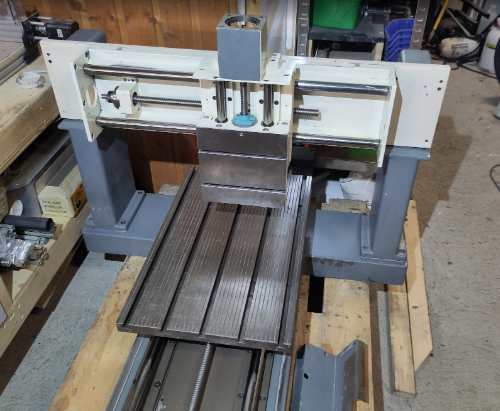
It cleaned up real nice so I take that as a confirmation that this is a fairly low-hours machineIt’s mostly back together again and I think the next step is to work on the motor mounts. To that end I took a bunch of measurements when I had it apart to be able to manufacture some adapter plates, I will start to just 3D print them and when I have a design I like i’ll cut them on my old CNC router. It hasn't been used in a while so that will be nice.
I also have the main layout of the electrical system finished, I just have some details left as well as doing the schematics, I am planning on doing a full set of schematics for this machine, I have been wanting to try QElectro tech and I think this is a nice project for that.Cheers
After that I started cleaning the machine and even though I hadn’t really planned it I also pulled apart like 90% of the mechanics and cleaned all the parts individually.This was really necessary as I hadn’t been able to get all the plastic chips and old grease of any other way.
This included pulling apart, cleaning and re-greasing both the needle bearings for the ballscrews and the linear carriages. As far as I can tell all this hardware is still available, the bearings and what not, so it shouldn’t be an issue to service it if any parts give out in the future.
Just look at that before and after. Some of the balls didn’t circulate at all since the traces were so full of hardened grease, depending on the loading direction. I got all of them running again after first wiping them down with break-clean and then flushing them with penetrating oil to loosen and rinse out all the grease.I didn’t remove any of the supported rails so hopefully I haven’t caused any alignment issue. We’ll see when everything is back together, I will do a proper alignment check then.
It cleaned up real nice so I take that as a confirmation that this is a fairly low-hours machineIt’s mostly back together again and I think the next step is to work on the motor mounts. To that end I took a bunch of measurements when I had it apart to be able to manufacture some adapter plates, I will start to just 3D print them and when I have a design I like i’ll cut them on my old CNC router. It hasn't been used in a while so that will be nice.
I also have the main layout of the electrical system finished, I just have some details left as well as doing the schematics, I am planning on doing a full set of schematics for this machine, I have been wanting to try QElectro tech and I think this is a nice project for that.Cheers
Attachments:
Last edit: 21 Jan 2026 10:35 by OHEngineering.
The following user(s) said Thank You: tommylight
Please Log in or Create an account to join the conversation.
Time to create page: 0.612 seconds