Rods "Spaceship" Scratch built Plasma Cutter build
- rodw
-
 Topic Author
- Offline
- Platinum Member
-

Less
More
- Posts: 12027
- Thank you received: 4103
23 Apr 2022 21:46 #241029
by rodw
Replied by rodw on topic Rods "Spaceship" Scratch built Plasma Cutter build
Yes, when I started making these parts 12 years ago I cut down 32mm x 8mm flat bar, drilled the holes and used a tapping head in a drill press. Then I got the blanks laser cut. Then I outsourced the whole job in Australia but they would often stuff up. So I sent it to China for a while and they never stuffed up.
But with all the logistics issues ex China, I decided to bring it back in house.
The little Seig SX3 mill shown with the sliding jig has a tapping function so pressing a button on the handle reverses direction so it works really well. Much easier than the bulky tapping head.
Using the jog function on the CNC VFD in manual mode is also just as good as the SX3 tapping mode and the 1.5 kW 3 phase spindle eats the countersinking.
The CNC plan is to hold 10 at a time with the parts located on a 10mm dowel in the spare hole that is needed for clearance purposes. For threading in the absence of an encoder input on the Ethercat electronics, I plan to use a 3 thread M8 x 1.25 threadmill. I've tested this in aluminium and the results are perfect.
Somebody suggested milling the countersink with a 12mm 45 deg spot drill to make it easier on the machine but I think just plunging with a countersink will be faster.
Please Log in or Create an account to join the conversation.
- machinedude
-

- Offline
- Platinum Member
-
Less
More
- Posts: 715
- Thank you received: 312
24 Apr 2022 00:56 #241044
by machinedude
Replied by machinedude on topic Rods "Spaceship" Scratch built Plasma Cutter build
plunging with the counter sink would be faster and faster is better until something breaks ") then a ramping tool path is going to seem like a great idea after the fact well that's usually how my luck goes most of the time anyways
then a ramping tool path is going to seem like a great idea after the fact well that's usually how my luck goes most of the time anyways
sometimes slow and easy wins the race in the long run, if you have something running smooth then it frees you up to do other things and not worry about the one machine that is pushing it's limits. fixturing to do as many parts as you can fit on the machine is good too. the longer it runs the more productive you are doing other things.
then a ramping tool path is going to seem like a great idea after the fact well that's usually how my luck goes most of the time anyways sometimes slow and easy wins the race in the long run, if you have something running smooth then it frees you up to do other things and not worry about the one machine that is pushing it's limits. fixturing to do as many parts as you can fit on the machine is good too. the longer it runs the more productive you are doing other things.
Please Log in or Create an account to join the conversation.
- SJDrummond
- Offline
- New Member
-

Less
More
- Posts: 1
- Thank you received: 0
11 Jul 2022 15:51 #247081
by SJDrummond
Replied by SJDrummond on topic Rods "Spaceship" Scratch built Plasma Cutter build
First off I'd like to say a big thank you for the information you have provided on your build. Ive been following your Spaceship Plasma build for a while and decided to take the plunge and swap my OpenBuilds Blackbox 4X control to a QTPlasmaC setup, using your electronics design as a base (albeit with different drivers).
My build so far contains:
- Mains filter IEC connector.
- A 70+70V 1000VA AC toroid from Airlink Transformers.
- Meanwell MDR-40-24 for Field power,
- Meanwell HDR-15-24 for ohmic sensing,
- 4 x DM860T AC Stepper drivers,
- MESA 7i96s with bulkhead ethernet connector, (7i76e was out of stock)
- MESA THCAD-10 for voltage reading,
- MESA THCAD-5 for Hypersensing (using Rods special magic),
- Hypertherm Powermax 45XP with Machine Torch and CPC.
Ive got a few questions that would really help me out if you have a minute.
- I was wondering if you had any updates/ new images of the control box at all?
- What the box is to the left of your Meadwell-MDR-40 on your "Spaceship MkII" image you uploaded previously?
- Which fuse holders did you use? Struggling to find similar ones.
- What are your relays being used for?
Ive done by best to find this information across all the forums but I think Ive now exhausted most of the list.
Thanks so much.
All the best,
Sean
Please Log in or Create an account to join the conversation.
- rodw
-
Topic Author
- Offline
- Platinum Member
-
Less
More
- Posts: 12027
- Thank you received: 4103
11 Jul 2022 17:49 #247089
by rodw
Replied by rodw on topic Rods "Spaceship" Scratch built Plasma Cutter build
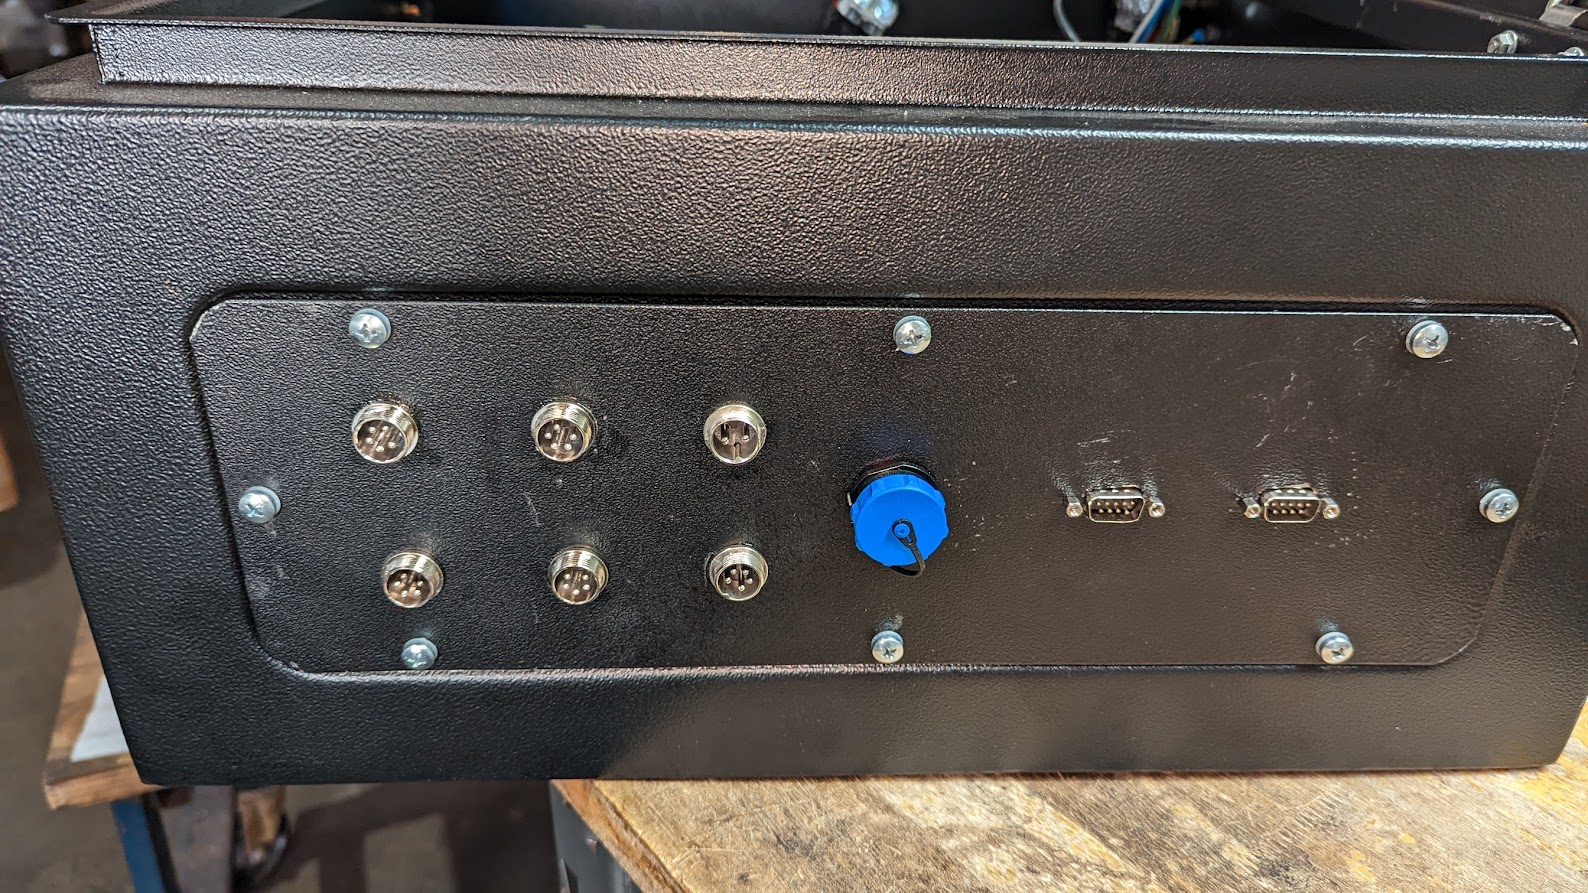
The part to the left is a contactor that is activated by the red safety relay
The fuse holders are from Ocean Controls Here in Australia oceancontrols.com.au/
The control box is still a work in progress. All the wiring to the stepper controllers are done
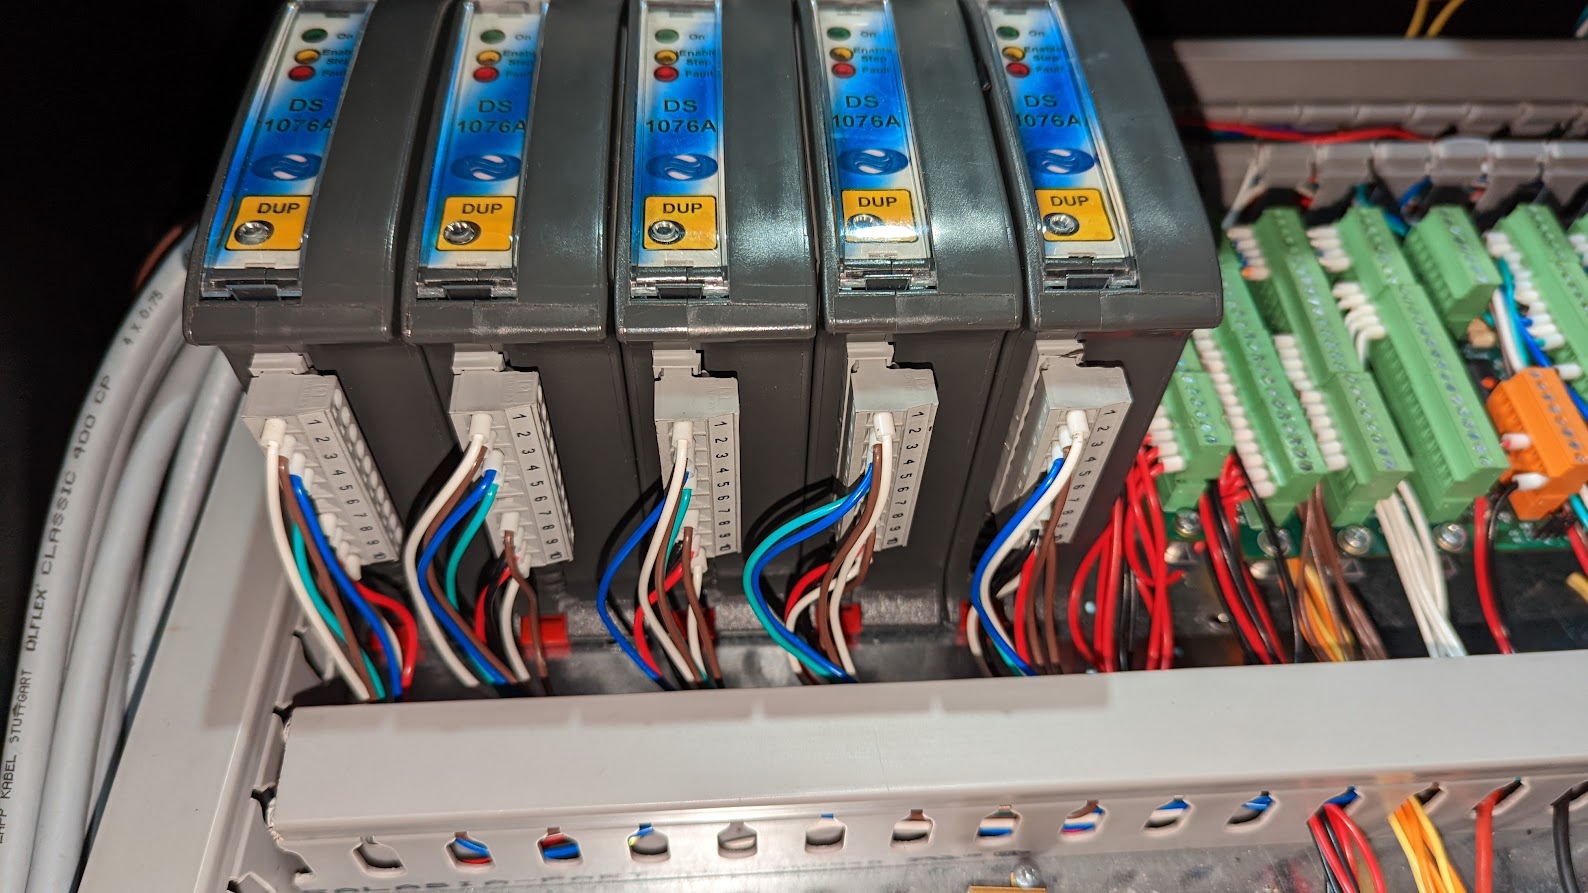
I got a friend to solder in all the connectors for the stepper motors because he's been trained to NASA standards when it come sot soldering
We used 5 pin connectors so the shield can be passed through right to the controllers themselves.
The 2 pin connector is for ohmic sensing.
The blue one is a Weipu 12 pin connector that goes to the Hypertherm CPC connector.
There is not really much left to do now. The DB9 connectors are for table and X axis sensors. So its just a matter of wiring them up and a couple of extra wires.
I would not use the silver GX616 connectors again as they are too time consuming to solder. The last control box on the mill just used cable glands and the wire went right to the drivers.
The fuse holders are from Ocean Controls Here in Australia oceancontrols.com.au/
The control box is still a work in progress. All the wiring to the stepper controllers are done
I got a friend to solder in all the connectors for the stepper motors because he's been trained to NASA standards when it come sot soldering
We used 5 pin connectors so the shield can be passed through right to the controllers themselves.
The 2 pin connector is for ohmic sensing.
The blue one is a Weipu 12 pin connector that goes to the Hypertherm CPC connector.
There is not really much left to do now. The DB9 connectors are for table and X axis sensors. So its just a matter of wiring them up and a couple of extra wires.
I would not use the silver GX616 connectors again as they are too time consuming to solder. The last control box on the mill just used cable glands and the wire went right to the drivers.
Attachments:
The following user(s) said Thank You: tommylight, my1987toyota, RNJFAB, SJDrummond
Please Log in or Create an account to join the conversation.
- my1987toyota
-

- Offline
- Platinum Member
-
Less
More
- Posts: 996
- Thank you received: 444
12 Jul 2022 13:27 #247135
by my1987toyota
Replied by my1987toyota on topic Rods "Spaceship" Scratch built Plasma Cutter build
hey rod maybe up-size to the GX20 connectors technically oversize but easier to solder. Anything else starts getting pricey.
The following user(s) said Thank You: rodw
Please Log in or Create an account to join the conversation.
- rodw
-
Topic Author
- Offline
- Platinum Member
-
Less
More
- Posts: 12027
- Thank you received: 4103
12 Jul 2022 19:35 - 12 Jul 2022 19:36 #247174
by rodw
Replied by rodw on topic Rods "Spaceship" Scratch built Plasma Cutter build
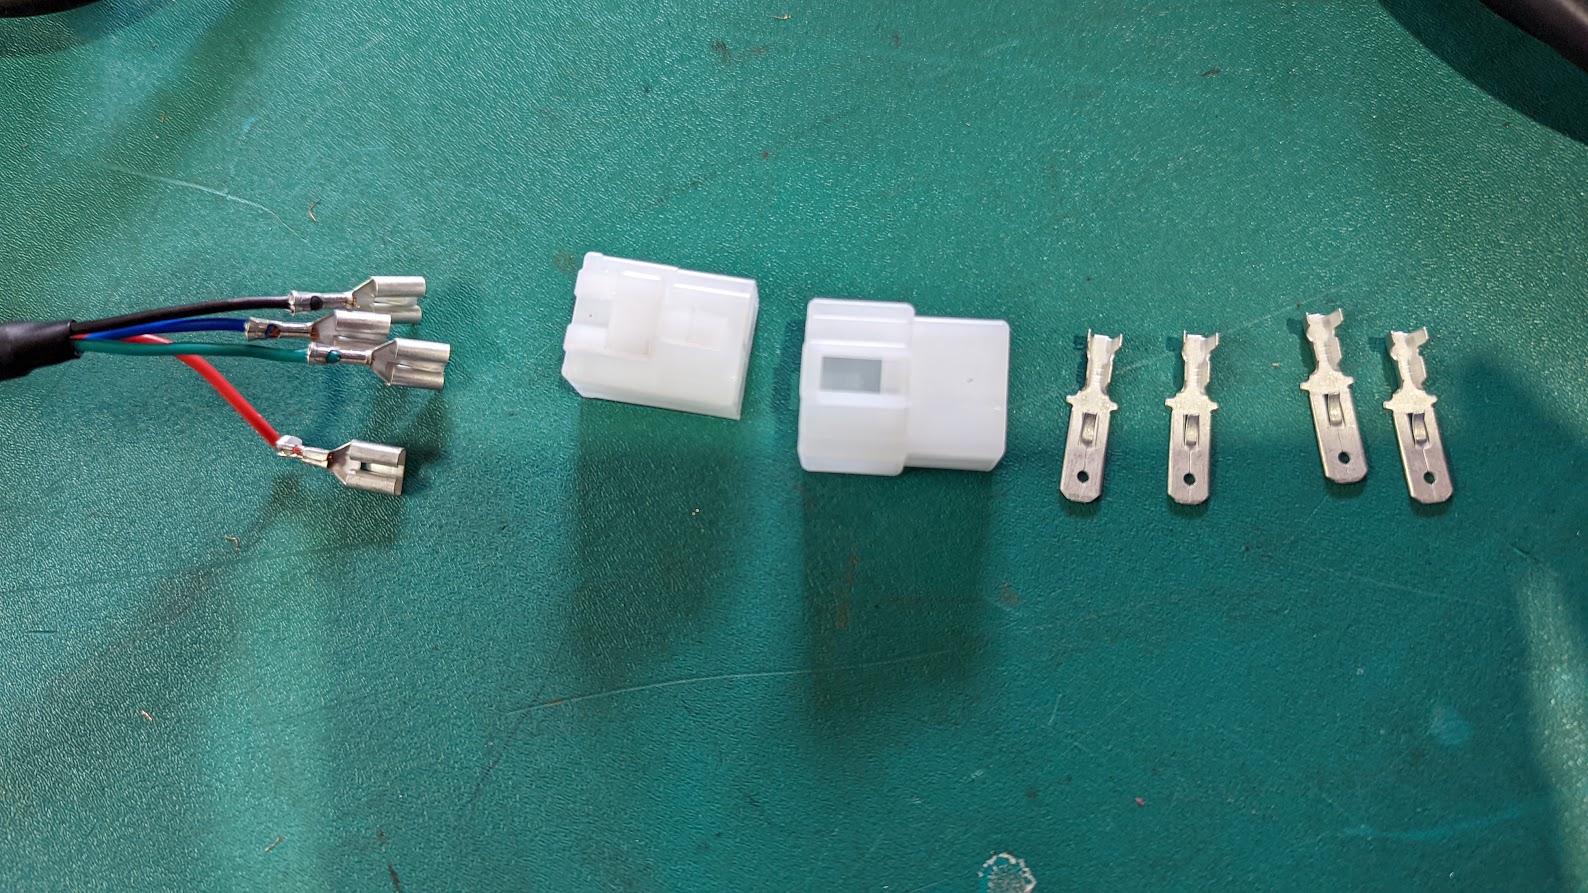
I was going to look round for crimp on options eg. Amphenol et al. Granted you need a crimping tool but the cost of contract soldering would pay for it in one job if my current tool does not work. At the motor end recently I've been using automotive QC connectors.
These need a crimper. Despite their looks, they are not compatible with the normal coloured automotive spade connectors.. But they are nice and light if suspended in the air and give a good contact.
These need a crimper. Despite their looks, they are not compatible with the normal coloured automotive spade connectors.. But they are nice and light if suspended in the air and give a good contact.
Attachments:
Last edit: 12 Jul 2022 19:36 by rodw.
The following user(s) said Thank You: my1987toyota
Please Log in or Create an account to join the conversation.
- andypugh
-

- Offline
- Moderator
-

Less
More
- Posts: 19876
- Thank you received: 4642
16 Jul 2022 18:49 #247489
by andypugh
Replied by andypugh on topic Rods "Spaceship" Scratch built Plasma Cutter build
I have said it before but I favour SpeakCon (and PowerCON) connectors as they are rugged, high quality and relatively cheap.
I am also keen on Lemo, but bought at a discount from eBay, in general.
I am also keen on Lemo, but bought at a discount from eBay, in general.
The following user(s) said Thank You: my1987toyota
Please Log in or Create an account to join the conversation.
- MontStar
-

- Offline
- New Member
-
Less
More
- Posts: 3
- Thank you received: 2
11 Oct 2022 07:38 #253937
by MontStar
Replied by MontStar on topic Rods "Spaceship" Scratch built Plasma Cutter build
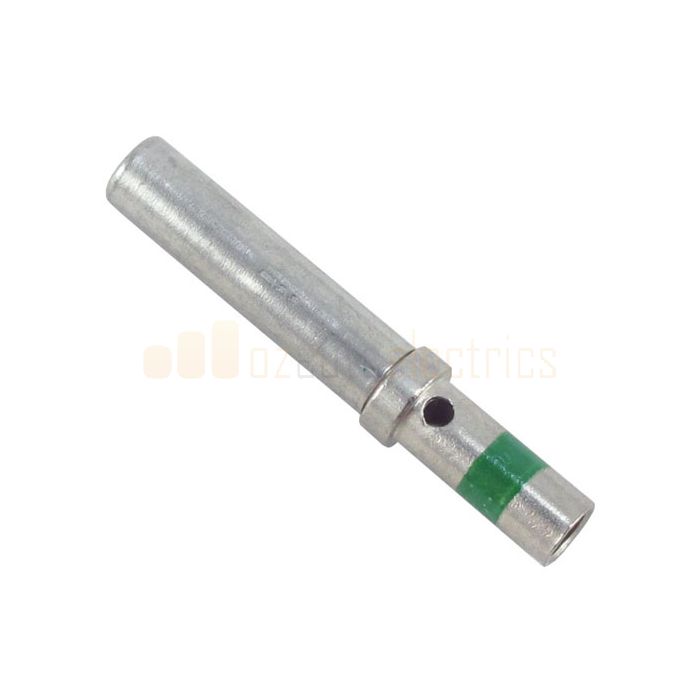
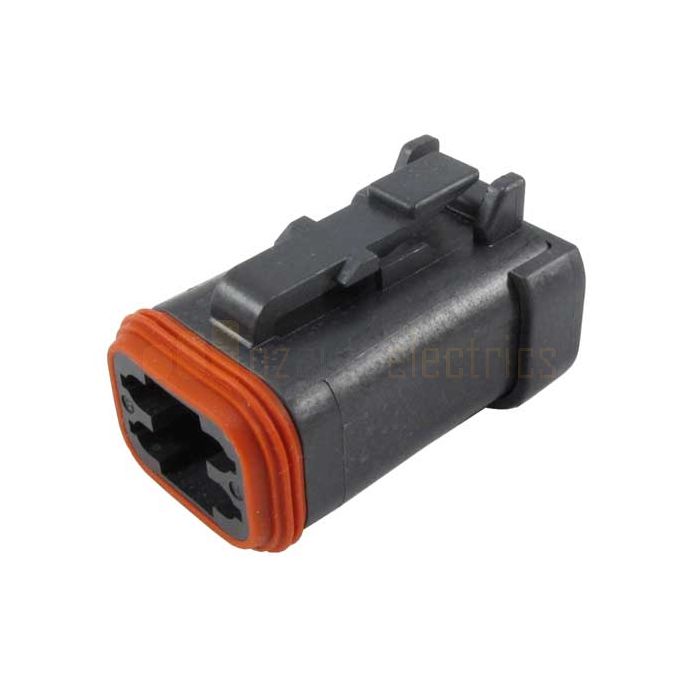
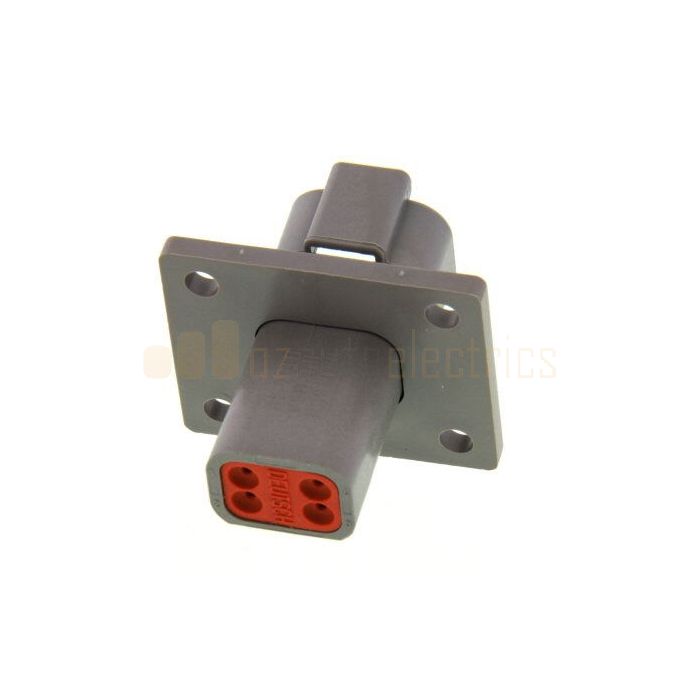
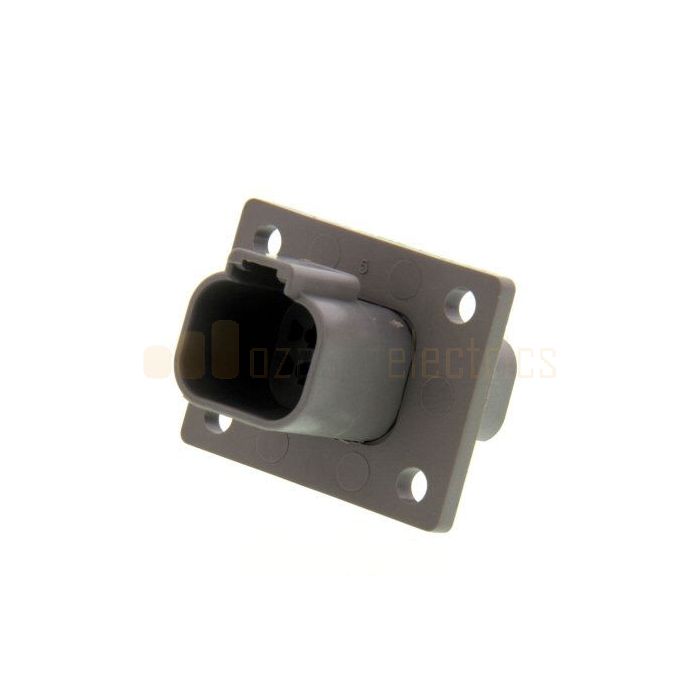
Hi Rod, I've been following the spaceship for a while.I'm thinking these would be a far better connector than QC connectors. Used widely in the mining world. Original Equipment for Caterpillar.
Have a look here www.ozautoelectrics.com

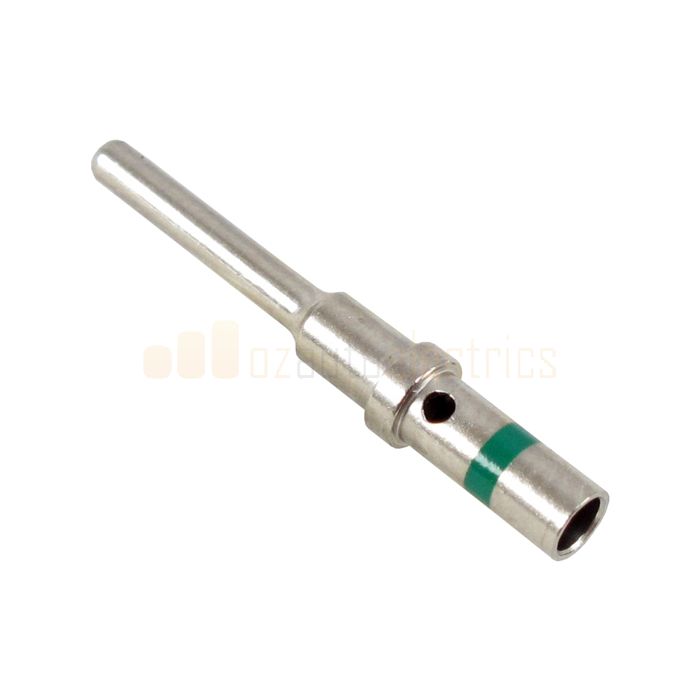

Have a look here www.ozautoelectrics.com
Attachments:
Please Log in or Create an account to join the conversation.
- rodw
-
Topic Author
- Offline
- Platinum Member
-
Less
More
- Posts: 12027
- Thank you received: 4103
11 Oct 2022 09:32 #253940
by rodw
Replied by rodw on topic Rods "Spaceship" Scratch built Plasma Cutter build
Yeh, the Deutsch connectors are becoming quite popular for vehicle wiring. Even the small ones are good for 16 amps. The price of some of the crimping tools is a bit eyewatering.
The QC's are about 1/4 the cost and were really a spur of the moment idea as I was driving past the supplier.
I have also thought of using Amphenol which are another crimpon connector.
There was a thread here that went right through correct wiring and shielding and from that best practice was to run the cable right through to te drive. Cable glands are even cheaper.
The following user(s) said Thank You: my1987toyota
Please Log in or Create an account to join the conversation.
- my1987toyota
-
- Offline
- Platinum Member
-
Less
More
- Posts: 996
- Thank you received: 444
11 Oct 2022 11:12 - 11 Oct 2022 11:14 #253952
by my1987toyota
Replied by my1987toyota on topic Rods "Spaceship" Scratch built Plasma Cutter build
I second the cable gland Idea not very convenient if you have to disconnect things but if you need IP68 then they are great. Best bang for the buck.
Last edit: 11 Oct 2022 11:14 by my1987toyota. Reason: updating info
The following user(s) said Thank You: rodw
Please Log in or Create an account to join the conversation.
Time to create page: 0.487 seconds