Pimping the mini-lathe
- RotarySMP
-
 Topic Author
- Offline
- Platinum Member
-

Less
More
- Posts: 1633
- Thank you received: 595
26 Jan 2020 13:26 - 05 Dec 2020 19:14 #155807
by RotarySMP
Pimping the mini-lathe was created by RotarySMP
EDIT: Added the Wiring diagram to this post.
EDIT> Added HAL and INI
I converted a 7x12 Mini-lathe to TurboCNC years ago, when there was no space in the apartment for a machine shop, other than a corner of the inner city balcony.
Since moving to a house with a basement, and getting a real lathe, the minilathe just lurked in a corner. There were a number of aspects of my previous conversion which were pretty half-arsed.
- 1 per rev spindle encoder for threading. Done with a optical gate and Schmitt trigger, the wiring was very messy.
- never installed the ball screw on X
- the plastic back gears broke, and the DC motor burnt out, so it was converted to 3ph 3/4 /hp induction motor and VFD with toothed belt drive to the spindle. Loosing the back gear meant it had little torque at low rpm.
- The bed grinder appeared okay, but the fit of the slides, and tail stock were horrible, with tiny contact points.
Figured it was time to learn to scrape in a whole machine, and the tiny size of the 7x12 mini-lathe means it is not too daunting a task.
There is a Mesa 7i96 inbound, to give this a LinuxCNC connection. I have a tiny gigabyte SBC and 10" touch screen to make a controller of matching scale to the lathe. It will take a while before I get to that part of the build.
This will be my first attempt at a multiple video series.
Mark
Last edit: 05 Dec 2020 19:14 by RotarySMP.
The following user(s) said Thank You: phillc54, NewGuyJim, fletch
Please Log in or Create an account to join the conversation.
- bbsr_5a
- Offline
- Platinum Member
-
Less
More
- Posts: 544
- Thank you received: 106
26 Jan 2020 16:56 #155819
by bbsr_5a
Replied by bbsr_5a on topic Pimping the mini-lathe
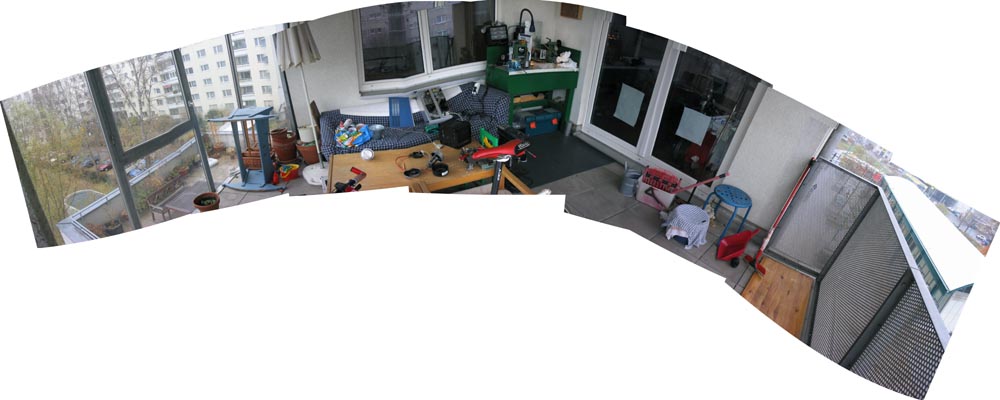
#What a View from the Workplace
Dont waste time on the Lathe get a telescope")
Dont waste time on the Lathe get a telescope
Please Log in or Create an account to join the conversation.
- RotarySMP
-
Topic Author
- Offline
- Platinum Member
-
Less
More
- Posts: 1633
- Thank you received: 595
26 Jan 2020 17:51 - 10 Dec 2020 16:39 #155834
by RotarySMP
Replied by RotarySMP on topic Pimping the mini-lathe
EDIT: Due 8 attachment limit, added backup copy of CAM_PP here.
Yep, the work going into this would probably be better invested in nearly anything else, but that is the definition of a hobby. Maximum input of time and money for minimum output.
My motivation for doing this is pretty sketchy.
- Nostalgia for when it was my only machine tool.
- Desire to properly finish a job I left with half-arsed solutions back then
- I like manual lathes, so if the Mini-lathe covers the rare times I need CNC, I could stick with a manual main lathe.
- Desire to learn to scrape in a machine, on something which doesn't have square meters of slide ways.
- Showcase just how far you can modify these things.
Mark
Last edit: 10 Dec 2020 16:39 by RotarySMP.
Please Log in or Create an account to join the conversation.
- RotarySMP
-
Topic Author
- Offline
- Platinum Member
-
Less
More
- Posts: 1633
- Thank you received: 595
03 Feb 2020 08:11 #156426
by RotarySMP
Replied by RotarySMP on topic Pimping the mini-lathe
I uploaded the second episode, which covers the progress of the last week.
As always, more progress was expected than acheived.The hope was for the bed to be finished, so I could move on to fittng the head stock. Maybe that is reflects a slight improvement in my expectations and standards though. David (Keilwinkel from the german forums) swung by on saturday. He has developed in a real master of scraping, and he gave some very helpful tips on how to improve the accuracy of printing such narrow ways.
There is still the forward lower way to scrape, the Tailstock clamping surface to machine, and the final scraping of the bed feet parallel to the top surface to do, so at least one more episode on the bed.
Mark
The following user(s) said Thank You: phillc54, tommylight
Please Log in or Create an account to join the conversation.
- bbsr_5a
- Offline
- Platinum Member
-
Less
More
- Posts: 544
- Thank you received: 106
03 Feb 2020 15:39 #156445
by bbsr_5a
Replied by bbsr_5a on topic Pimping the mini-lathe
are you also moving the Tailstock on Gcode and the "Pinole" so a fully Automated machine is to be made
Please Log in or Create an account to join the conversation.
- RotarySMP
-
Topic Author
- Offline
- Platinum Member
-
Less
More
- Posts: 1633
- Thank you received: 595
03 Feb 2020 15:42 #156446
by RotarySMP
Replied by RotarySMP on topic Pimping the mini-lathe
Just the Z and X axis and the spindles VFD will be under CNC control. I'll use a manual QCTP and keep the tailstock manual.
Mark
Mark
Please Log in or Create an account to join the conversation.
- RotarySMP
-
Topic Author
- Offline
- Platinum Member
-
Less
More
- Posts: 1633
- Thank you received: 595
09 Feb 2020 16:26 #156885
by RotarySMP
Replied by RotarySMP on topic Pimping the mini-lathe
I finished scraping the bed ways, and used the LinuxCNC controlled MAHO MH400E to correct the horrible job the manufacturer did on the tail stock clamping surfaces under the bed. Here is the third episode of the video series.
Digital µm micrometers are surprisingly difficult to use on scraped surfaces. Since the individual scrape marks are a couple of µm deep, you get a fair bit of scatter in your readings.
Glad I choose the little mini-lathe as the first full machine scraping project. It is quite seriously time consuming.
Mark
The following user(s) said Thank You: phillc54, tommylight
Please Log in or Create an account to join the conversation.
- RotarySMP
-
Topic Author
- Offline
- Platinum Member
-
Less
More
- Posts: 1633
- Thank you received: 595
16 Feb 2020 21:24 #157520
by RotarySMP
Replied by RotarySMP on topic Pimping the mini-lathe
This episode is a bit disjointed, with some pretty crappy camera work I'm afraid. Some of the footage is a couple of months old, from before I really got into the video thing. Also I filmed making the 30mm lap, as the spindle was a just above the tolerance range for the bearings. Then I forgot to shoot footage of using it. Sorry.
The following user(s) said Thank You: phillc54, J Green
Please Log in or Create an account to join the conversation.
- J Green
- Offline
- Elite Member
-

Less
More
- Posts: 164
- Thank you received: 24
16 Feb 2020 23:04 #157528
by J Green
Replied by J Green on topic Pimping the mini-lathe
Mark
Thanks for the continuation about your mini lathe . What a great way to get through these winter months.
The 3-D printer is almost like having a in home foundry. Wonder if a printed lap would work ,could print in relief spirals - slits -etc.
Have you ever thought about including a metal piece into the 3-D printed part? As in printing on to a metal piece.
. Cheers
Bob
Please Log in or Create an account to join the conversation.
- RotarySMP
-
Topic Author
- Offline
- Platinum Member
-
Less
More
- Posts: 1633
- Thank you received: 595
17 Feb 2020 08:42 - 17 Feb 2020 10:14 #157569
by RotarySMP
Replied by RotarySMP on topic Pimping the mini-lathe
Hi Bob,
3D printers really are a cool tool. I made this one a few years ago, but it takes a while to "see" printed solutions rather than what you expect. It took me all of 6 minutes to model that lathe dog, another 30 seconds to generate the G code, and then abot an hour to print (while I did other things). Of course, it could still be an complete failure of the torque loads are too high, but I doubt that for turning a test bar.
Good point about the plastic lap. Not sure whether the lapping compound wouldn't just disappear into the plastic. Have to try that when I make a lap for the test bar. Thanks for the idea.
With this style of layered spaghetti printer, you can' print around a metal insert, as the nozzle is only 0.2 above the glass when it starts. What you do is print in hex shaped features to capture metallic nuts. I was too lazy to take the extra minute on that job.
Mark
Last edit: 17 Feb 2020 10:14 by RotarySMP.
Please Log in or Create an account to join the conversation.
Moderators: piasdom
Time to create page: 0.363 seconds