1982 Matsuura MC-500v Retrofit
- chopper79
-
 Topic Author
- Offline
- Elite Member
-

Less
More
- Posts: 193
- Thank you received: 44
11 Feb 2017 18:07 - 12 Feb 2017 16:47 #87830
by chopper79
Replied by chopper79 on topic 1982 Matsuura MC-500v Retrofit
Just seen this.... I was starting to lean towards ground after looking at it some more. I will give it a shot and see if I can at least get the fwd led to illuminate.
Thank you PCW
***Update on spindle drive***
If you have the Yaskawa VS-626 MTII on your machine (Matsuura MC-500v2) then you will need the following:
Pins on connector 1CN
Pin 9 = Analog speed control +/- 10v
Pin 10 = Analog speed control gnd
Pin 13 = Estop
Pin 15 = Signal ground
Pin 16 = Spindle forward
Pin 17 = Spindle reverse
Pin 22 = Spindle orientation command
Pin 15 (signal ground) need to be closed to the pin needed. Such as 7i77 24v+ output goes to a relay and the relay closes the connection from pin 15 to pin needed on VFD. The VFD pins take a ground input not + voltage
Pins 9 and 10 will go to the spindle output designated on the 7i77. The 7i77 will drive these directly.
Also do not over look the outputs on the VFD.
At speed output (Just nice to have so LCNC knows that spindle is at requested speed)
Orientation complete output (need for ATC)
There are other outputs that could be handy also if used.
See previous posts for all manuals and schematics of factory wiring and components.
Last edit: 12 Feb 2017 16:47 by chopper79.
Please Log in or Create an account to join the conversation.
- chopper79
-
Topic Author
- Offline
- Elite Member
-
Less
More
- Posts: 193
- Thank you received: 44
11 Feb 2017 23:23 #87845
by chopper79
Replied by chopper79 on topic 1982 Matsuura MC-500v Retrofit
Working out all the relays and tool change I/o. Rewiring all the relays, contacts, and misc that needs handled for things to work. I hope to have this stuff hooked up to the 7i77 on Sunday and then start on the classic ladder for the ATC. Time to pick up and have a beer!
Please Log in or Create an account to join the conversation.
- tommylight
-

- Offline
- Moderator
-

Less
More
- Posts: 21646
- Thank you received: 7395
12 Feb 2017 02:33 #87853
by tommylight
Replied by tommylight on topic 1982 Matsuura MC-500v Retrofit
Just so you know, i'watching you ! ")
Dude, where's my beer?
Nice progress, for sure.
I finished mine a few days ago, in the mean time i did another retrofit on a plasma cutter, also finished today.
Regards,
Tom
Dude, where's my beer?
Nice progress, for sure.
I finished mine a few days ago, in the mean time i did another retrofit on a plasma cutter, also finished today.
Regards,
Tom
The following user(s) said Thank You: chopper79
Please Log in or Create an account to join the conversation.
- chopper79
-
Topic Author
- Offline
- Elite Member
-
Less
More
- Posts: 193
- Thank you received: 44
12 Feb 2017 04:48 - 12 Feb 2017 16:30 #87858
by chopper79
Replied by chopper79 on topic 1982 Matsuura MC-500v Retrofit
Thank you
Sounds like me right now.... Trying to finish this thing up and multiple projects right now. I hope the classic ladder will be smooth sailing. Never worked with CL before so this will get interesting I am sure.
Sounds like me right now.... Trying to finish this thing up and multiple projects right now. I hope the classic ladder will be smooth sailing. Never worked with CL before so this will get interesting I am sure.
Last edit: 12 Feb 2017 16:30 by chopper79.
Please Log in or Create an account to join the conversation.
- chopper79
-
Topic Author
- Offline
- Elite Member
-
Less
More
- Posts: 193
- Thank you received: 44
12 Feb 2017 16:27 - 12 Feb 2017 16:28 #87873
by chopper79
Replied by chopper79 on topic 1982 Matsuura MC-500v Retrofit
While working on finishing the I/O. I have been thinking about the classic ladder for my ATC.
Sequence:
M6 T# called out
Z axis goes to change position (switches are located to detect if it is at position)
Spindle orientates
tool magazine moves in
Tool releases
Tool magazine moves down
Tool magazine rotates CW or CCW to the called tool
(Need to check if there is a air blast to clear the taper and chips before mag moves up)
Magazine moves up
Tool clamps
Magazine moves away
Machine goes back to work......
There are limit switches for
Mag in + out
Tool 1
Z axis tool change position
Mag up and down
Need to figure out how to use classic ladder to make this. I have never used CL before so this will be an interesting experience.
Last edit: 12 Feb 2017 16:28 by chopper79.
Please Log in or Create an account to join the conversation.
- chopper79
-
Topic Author
- Offline
- Elite Member
-
Less
More
- Posts: 193
- Thank you received: 44
13 Feb 2017 13:19 - 13 Feb 2017 13:23 #87906
by chopper79
Replied by chopper79 on topic 1982 Matsuura MC-500v Retrofit
Almost finished with the wiring for all of the I/O. Down to my last 4 outputs on the 7i77 and if all goes well I will have exactly enough to complete the wiring. Inputs are not even close to being used up. (May need to by an additional output board)
Ran across two contacts that go up the tool change assembly. There are already two that go there so I am trying to figure out what those additional two would be used for?
The tool change assembly works (mag in , mag out, rotate cw, rotate ccw)so not sure why they second contacts. My guess is since one goes to magazine forward/reverse and the other goes to magazine cw/ccw is that they are brakes of some sort.
I will have to given them a trigger while rotating the tool changer and see if a brake is applied to dead stop the rotation. This would make sense to me as if I rotate the tool change now it seems to not always line up correctly. Seems to have a little free spin as the motor coast to stop.
I will update more about this later today or tomorrow.
Last edit: 13 Feb 2017 13:23 by chopper79.
Please Log in or Create an account to join the conversation.
- skunkworks
- Offline
- Moderator
-
Less
More
- Posts: 349
- Thank you received: 152
13 Feb 2017 13:28 #87907
by skunkworks
Replied by skunkworks on topic 1982 Matsuura MC-500v Retrofit
Yes - probably the brakes. I had to do some funky stuff to get that to work in ladder. IIRC - I run the motor until it hits the limit - then apply the brake relay while the motor is still on for a short amount of time (power needs to be applied to the motor for the brake to work). Then both the motor and brake is turned off. (They motors get pretty hot if you leave the brake and motor on)
Both motors act the same (rotation and in-out)
sam
Both motors act the same (rotation and in-out)
sam
The following user(s) said Thank You: chopper79
Please Log in or Create an account to join the conversation.
- sinusvag
- Offline
- New Member
-

Less
More
- Posts: 9
- Thank you received: 1
13 Feb 2017 17:46 #87922
by sinusvag
Replied by sinusvag on topic 1982 Matsuura MC-500v Retrofit
Nice write-up! Will be interesting to follow the classicladder part!
Cheers from Sweden
Cheers from Sweden
The following user(s) said Thank You: chopper79
Please Log in or Create an account to join the conversation.
- chopper79
-
Topic Author
- Offline
- Elite Member
-
Less
More
- Posts: 193
- Thank you received: 44
14 Feb 2017 03:41 #87939
by chopper79
Replied by chopper79 on topic 1982 Matsuura MC-500v Retrofit
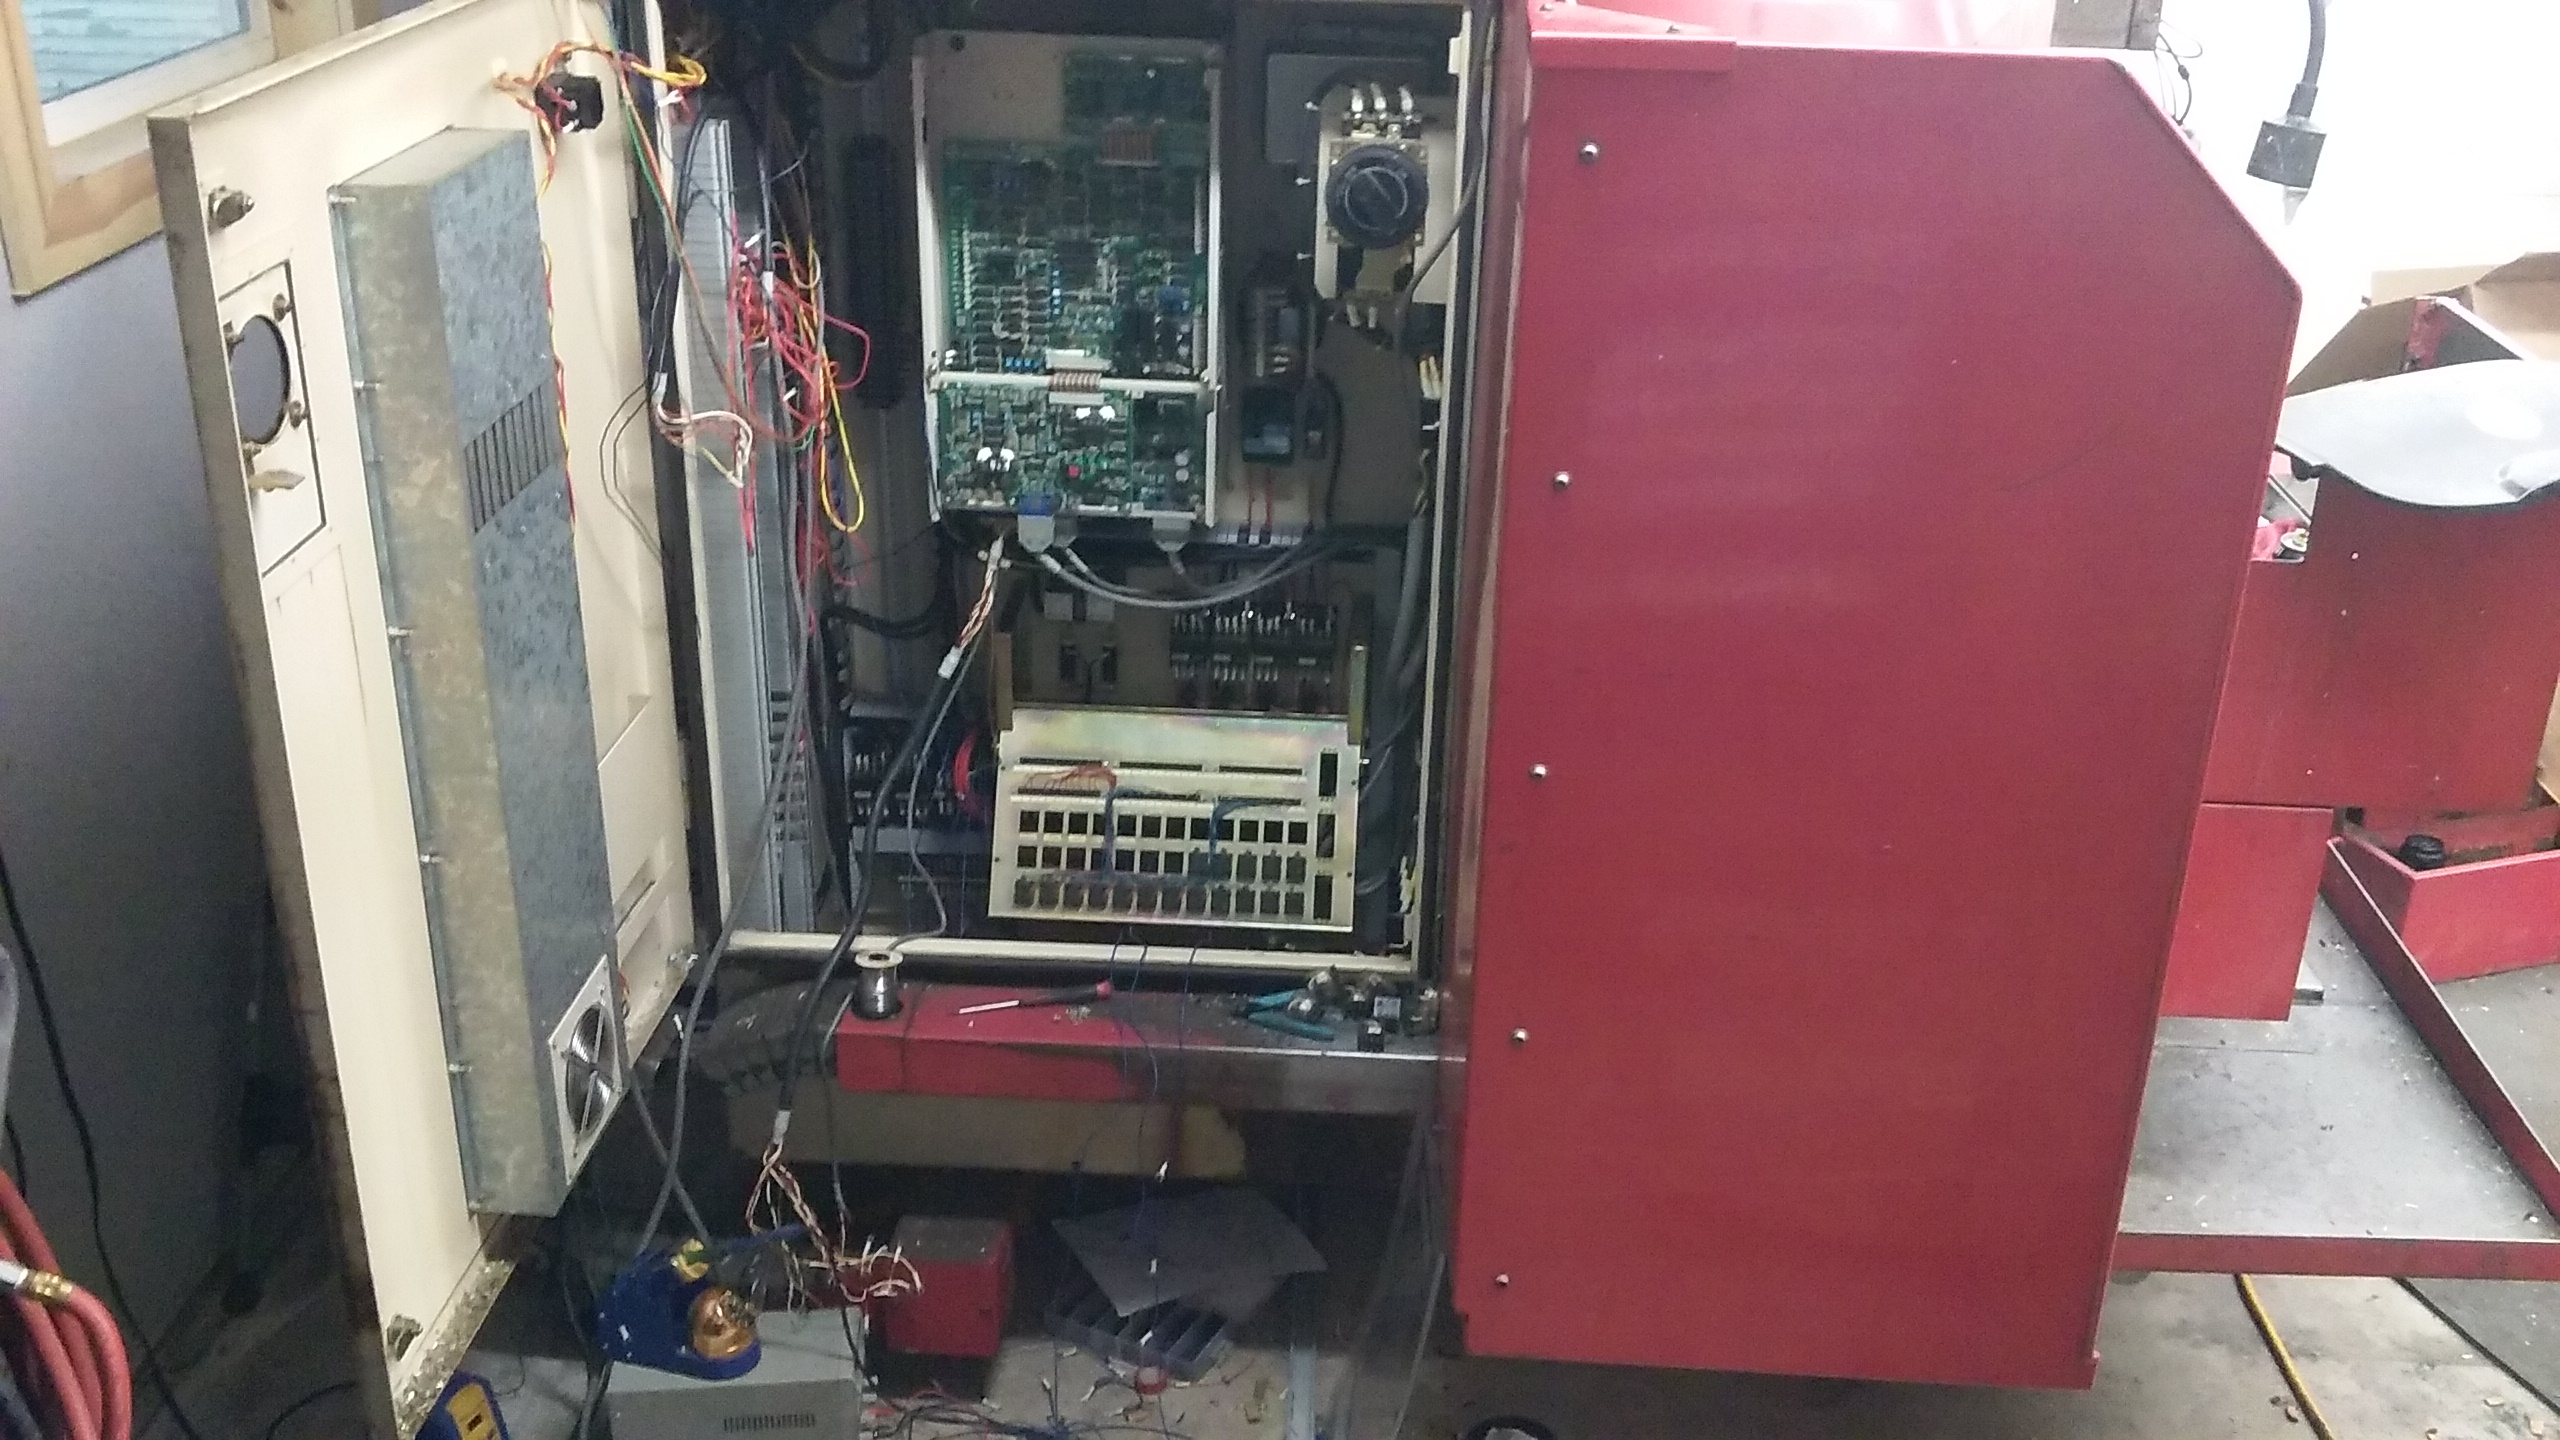
This is where the limits and connections are located for the ATC. (Pardon the mess. Previous owner must not liked to clean)
Draw bar limits
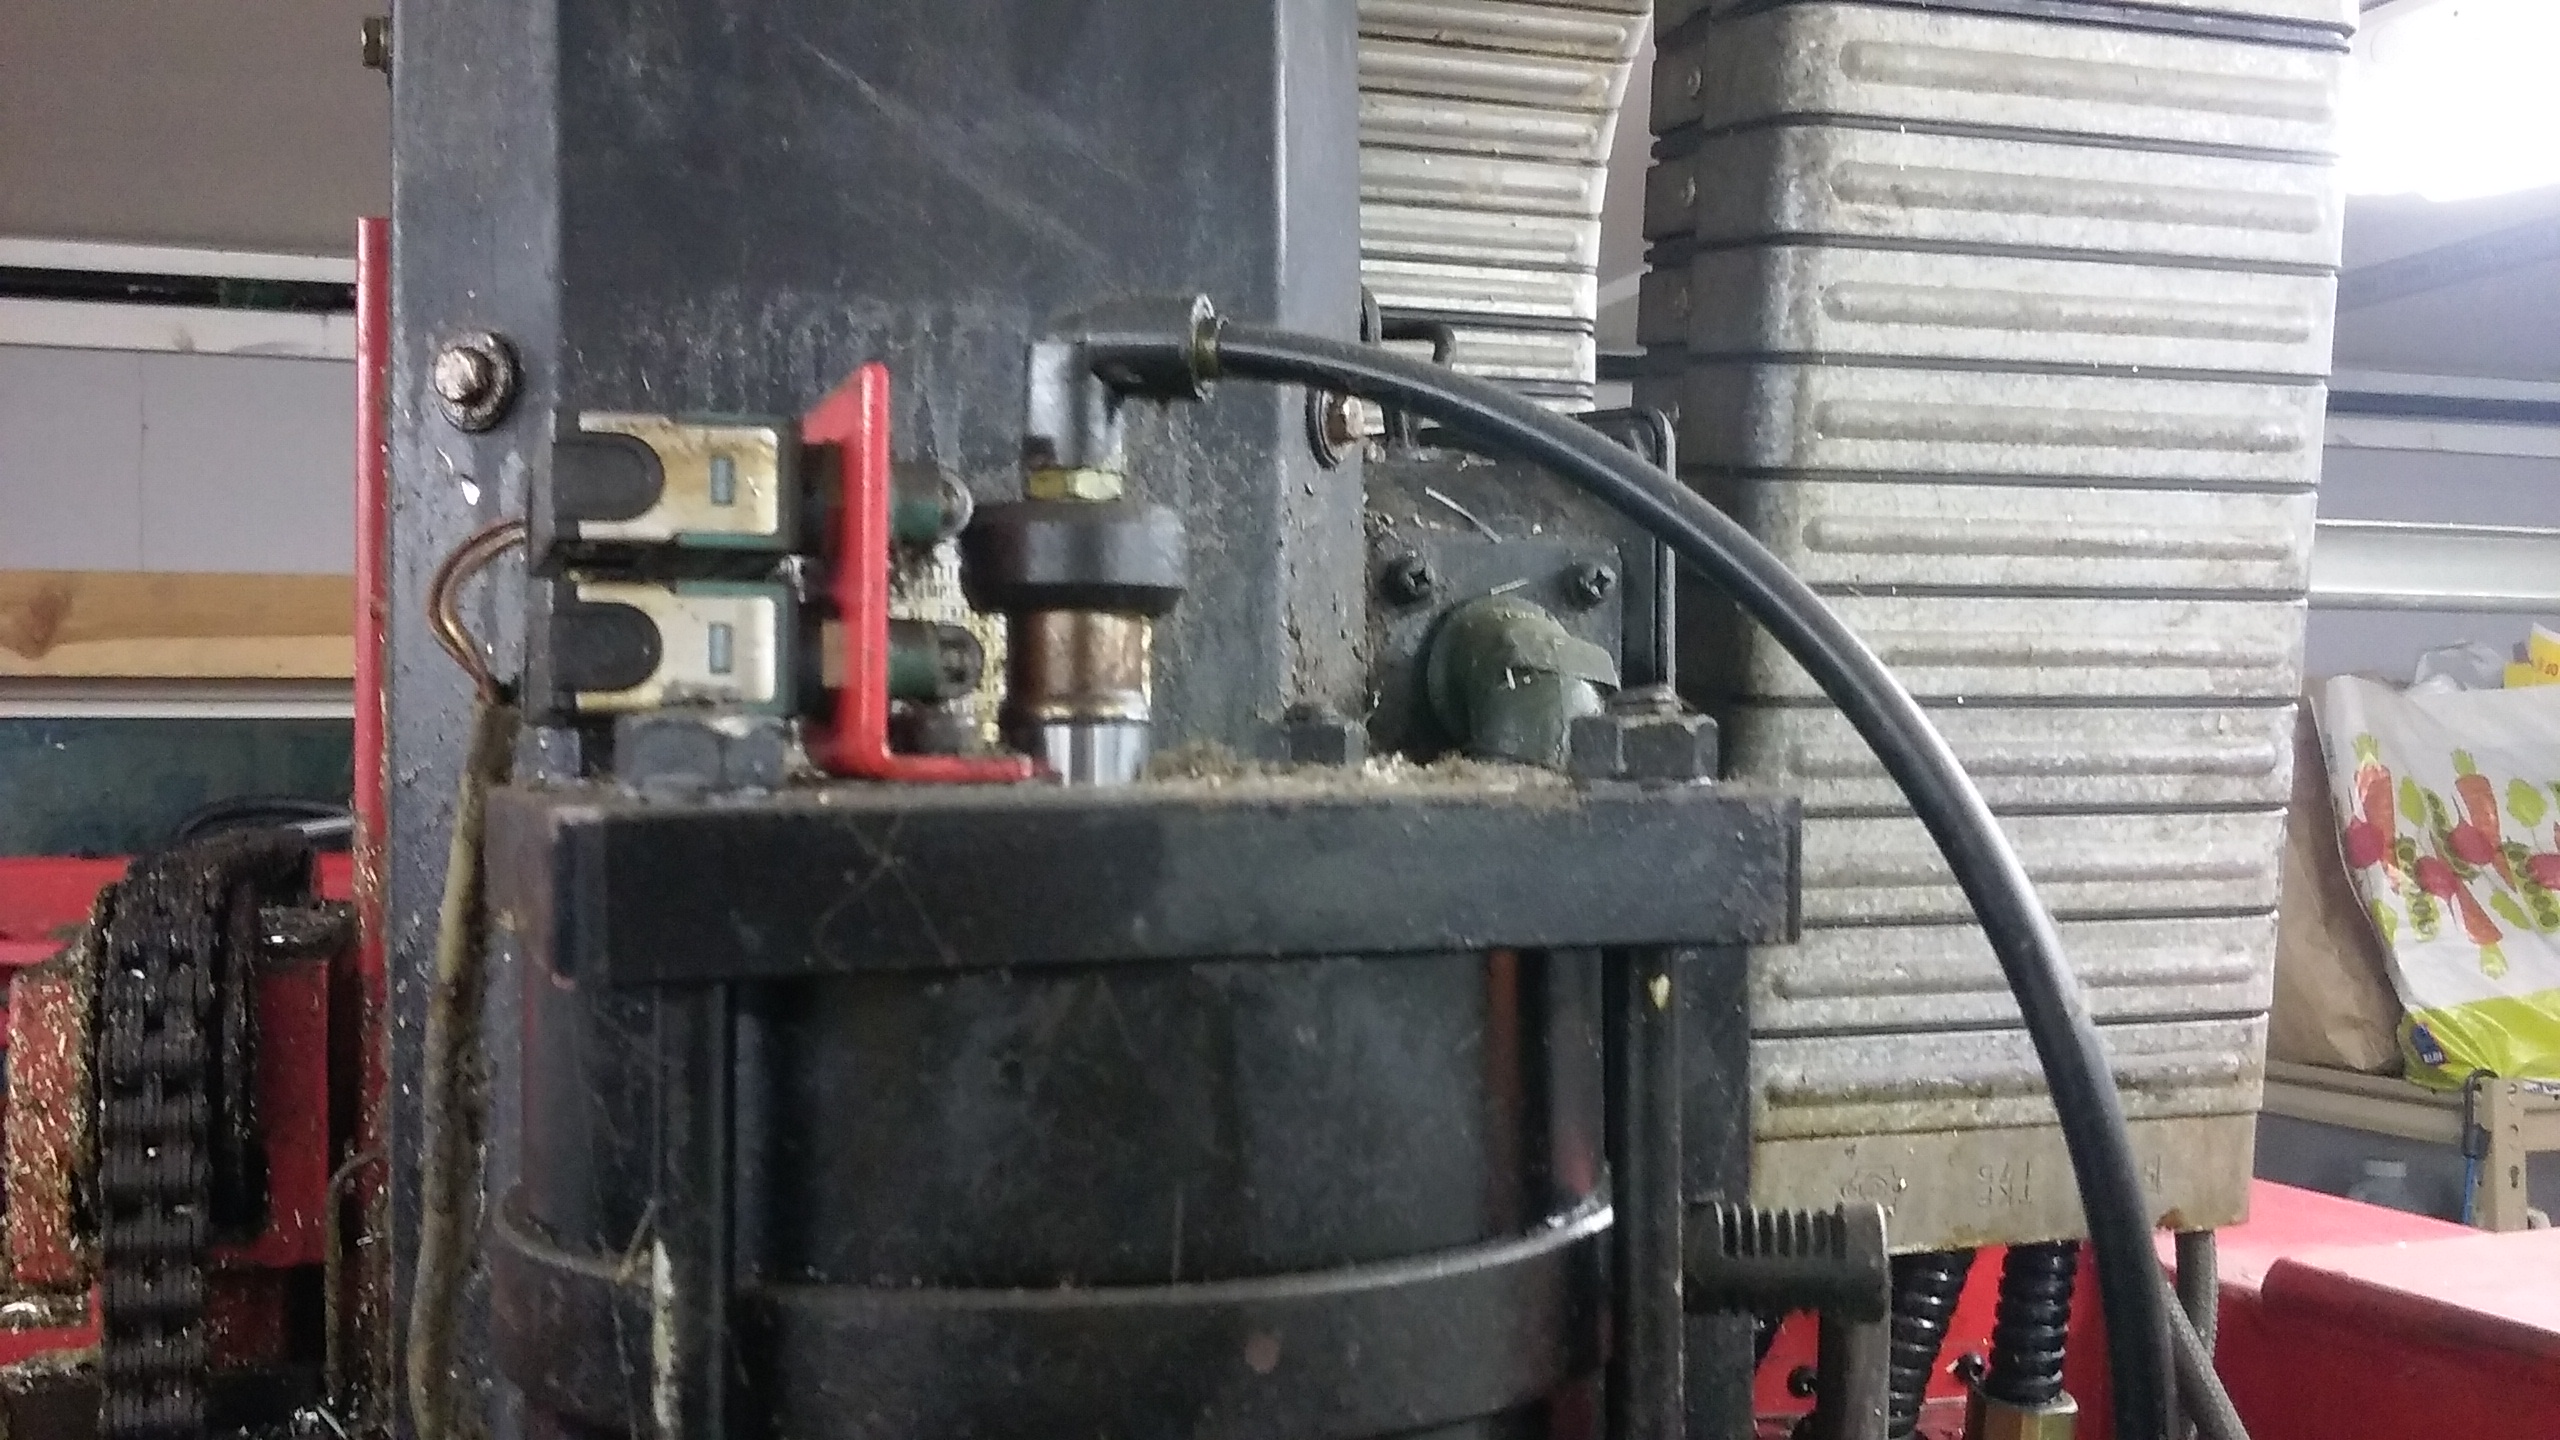
Tool magazine up and down limits
Tool magazine in and out limits
Connection points for the tool magazine CW and CCW. The limits are under the magazine
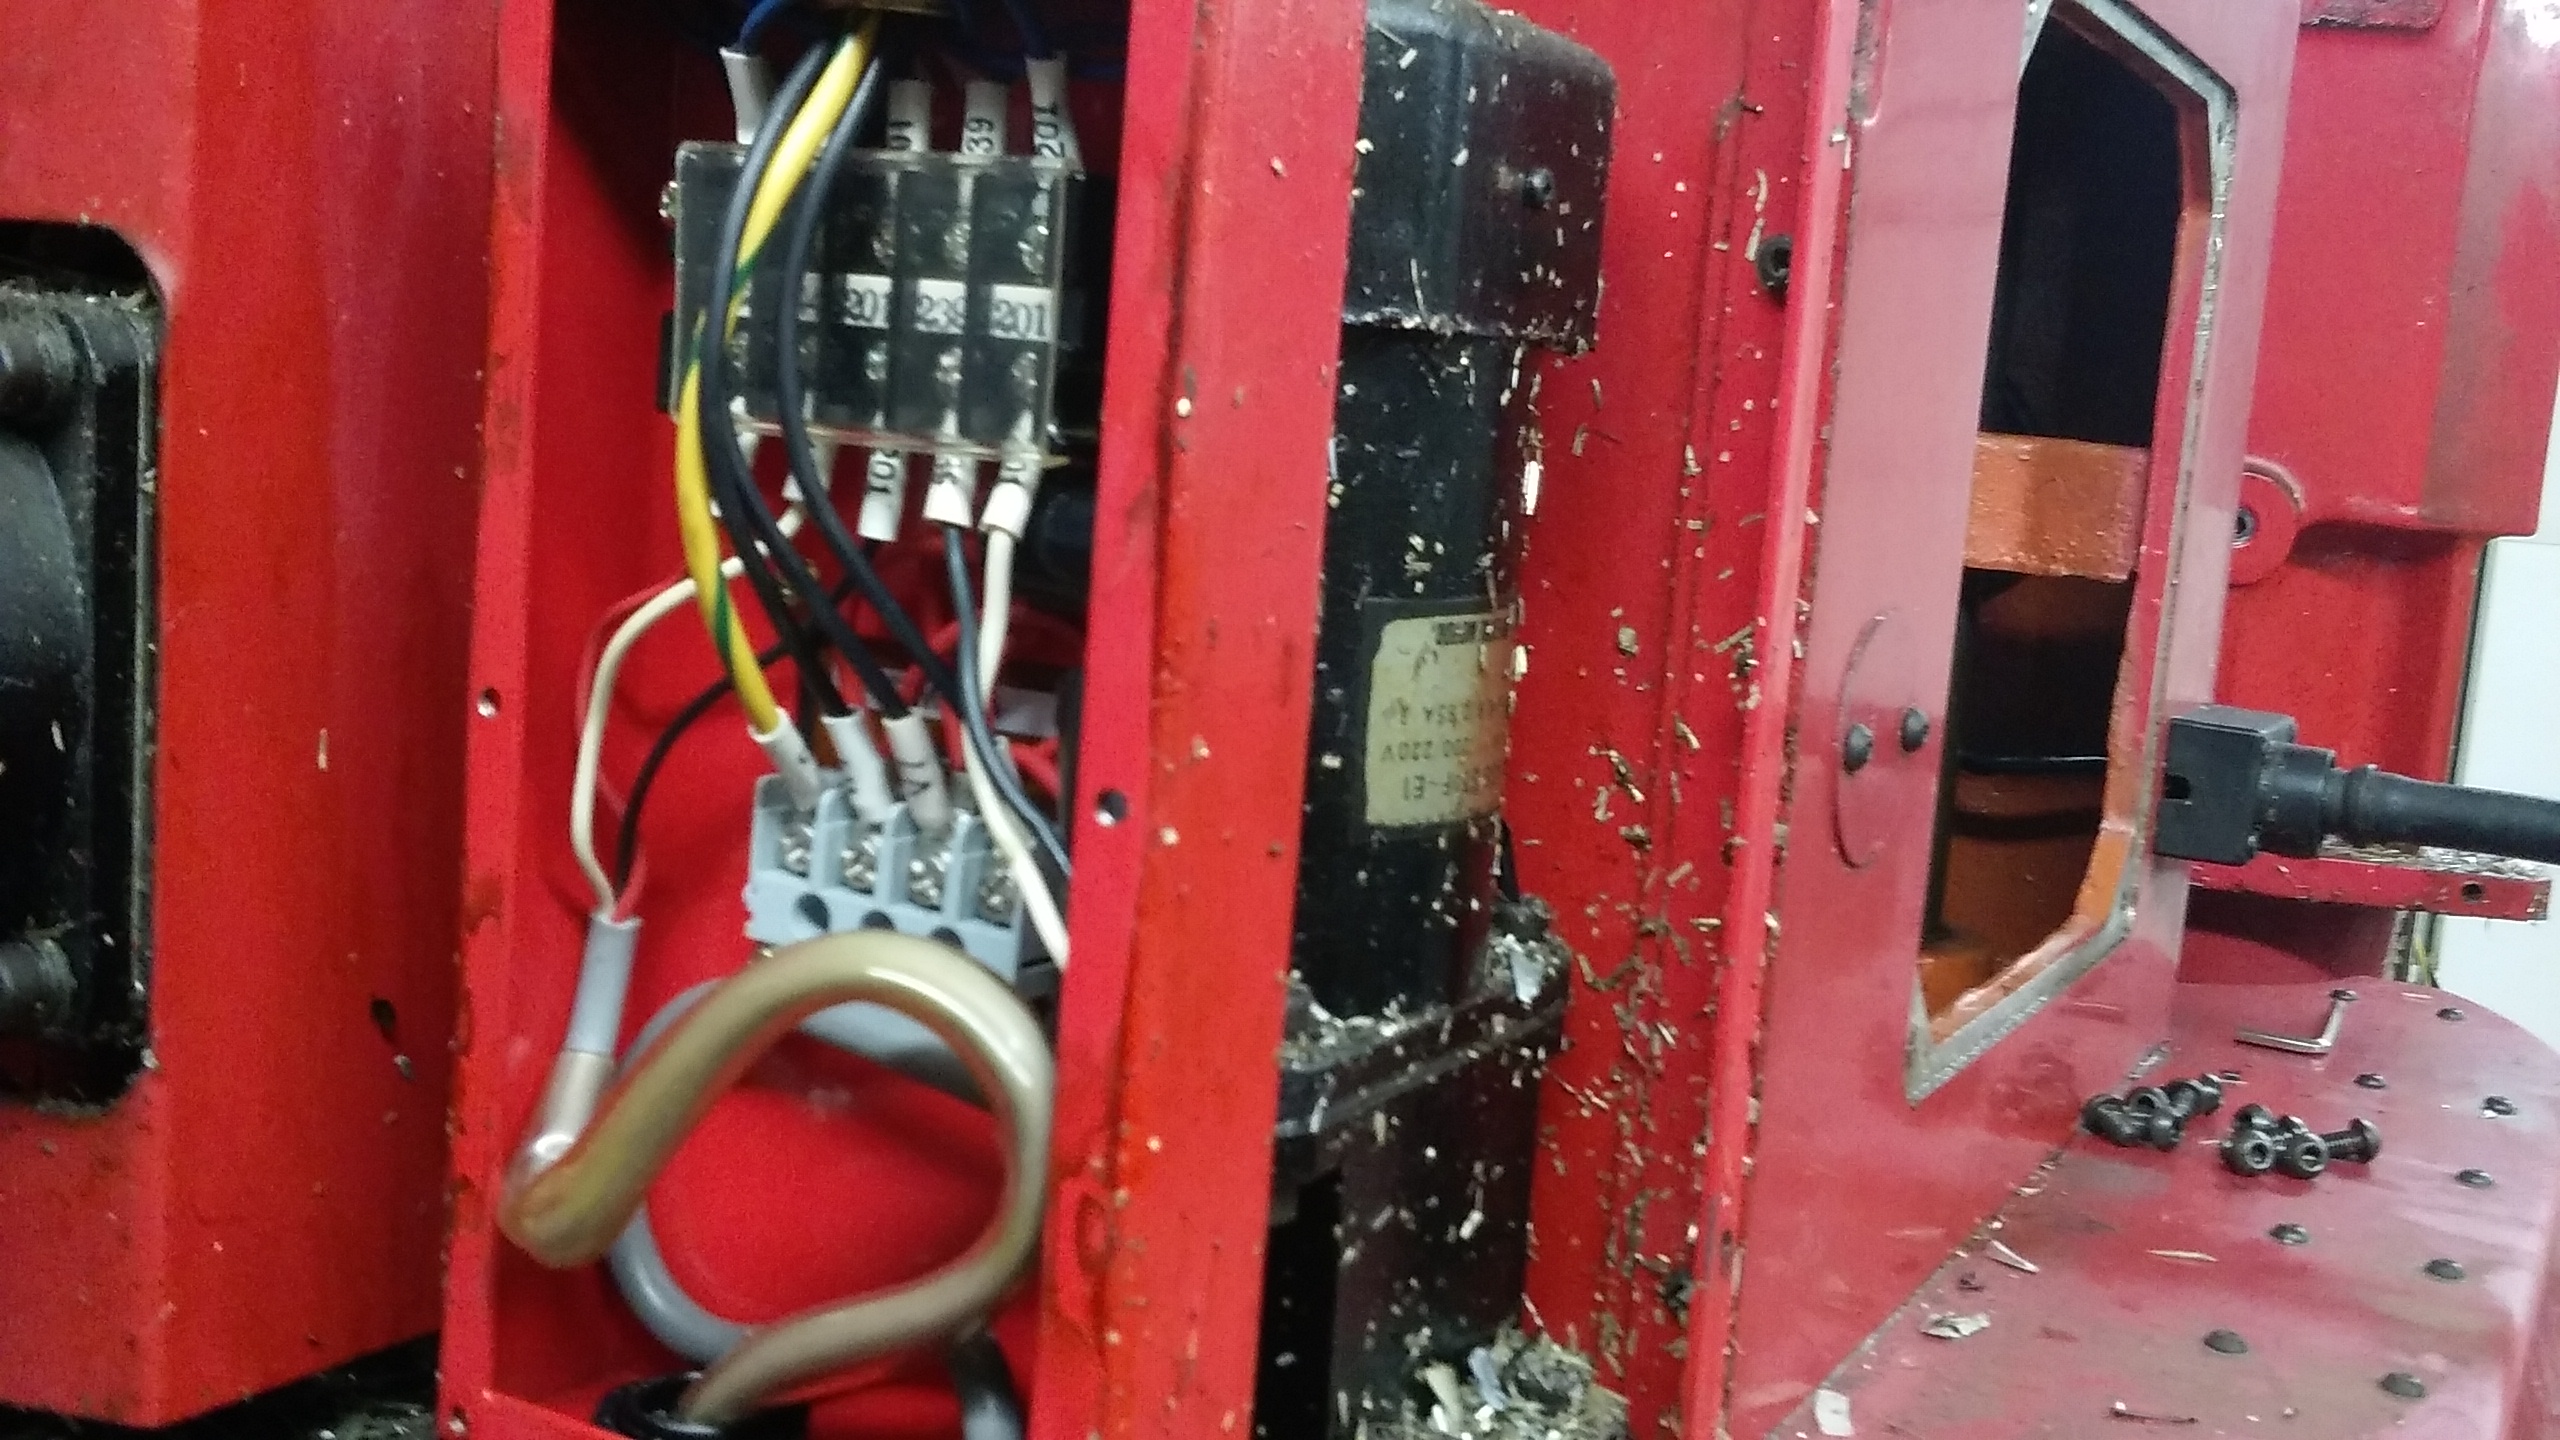
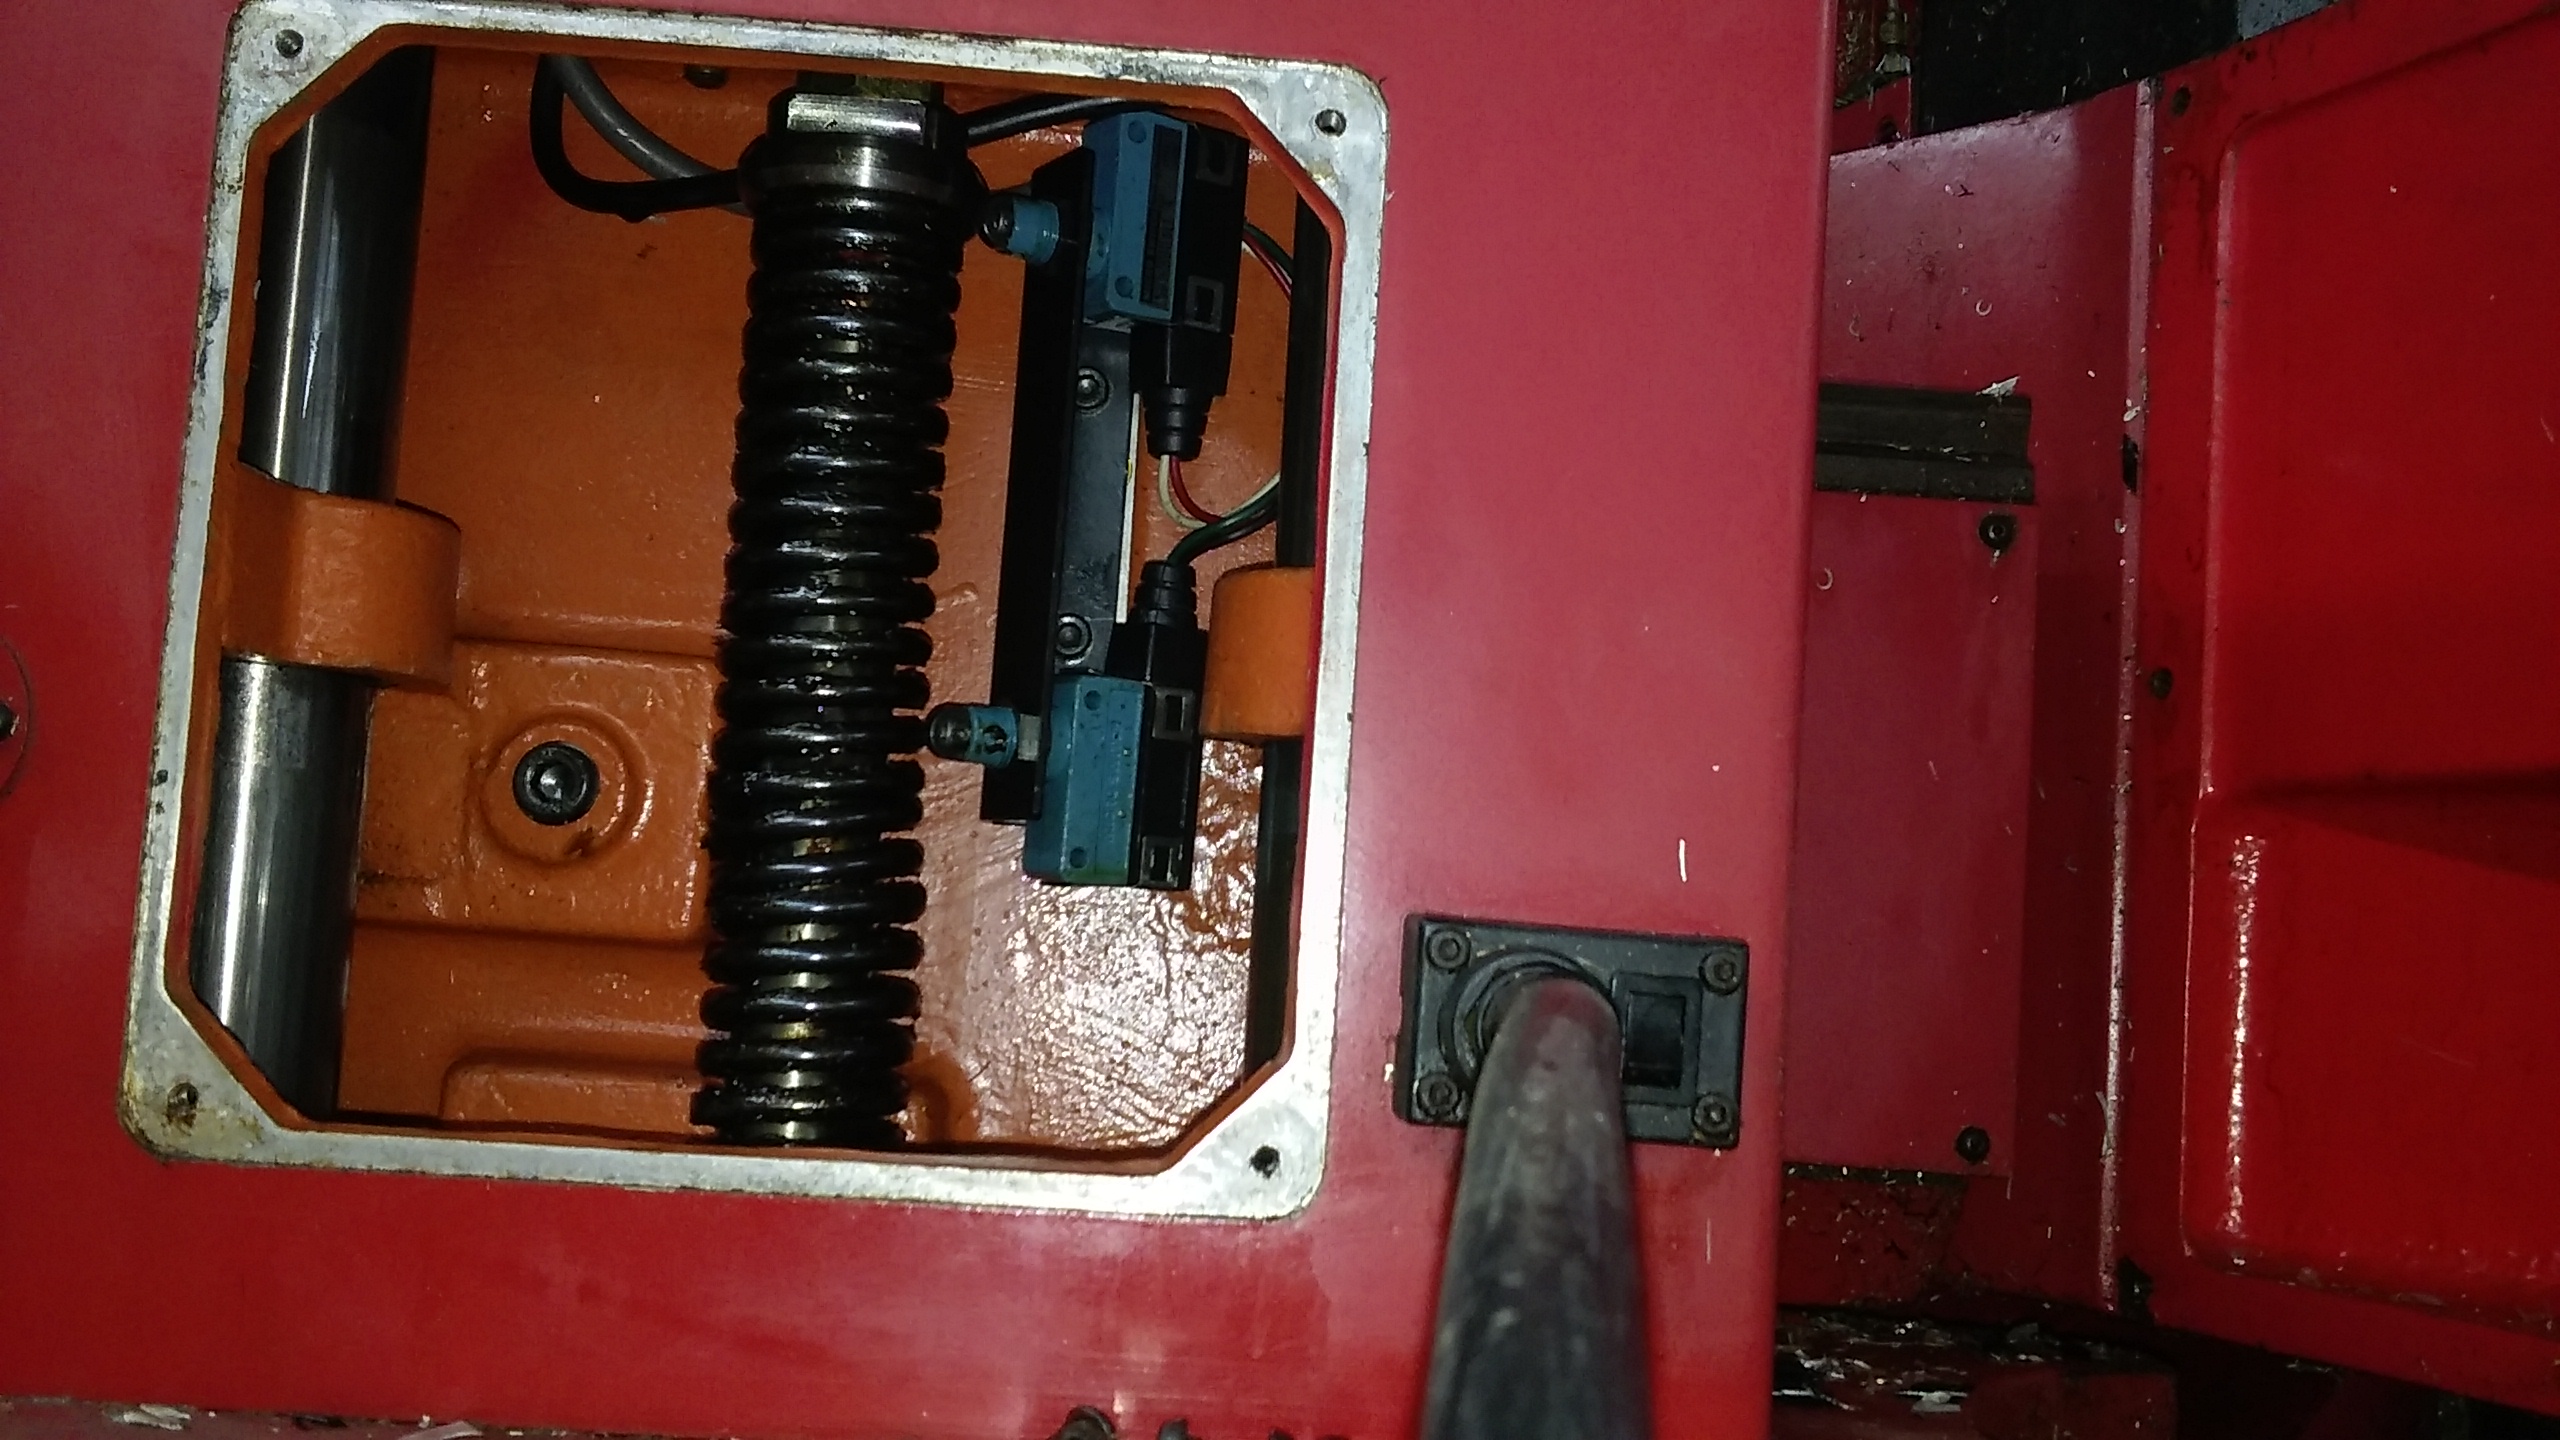
Junction box for all tool magazine limits, power, and goofy light. Also note the pneumatic valve for magazine down
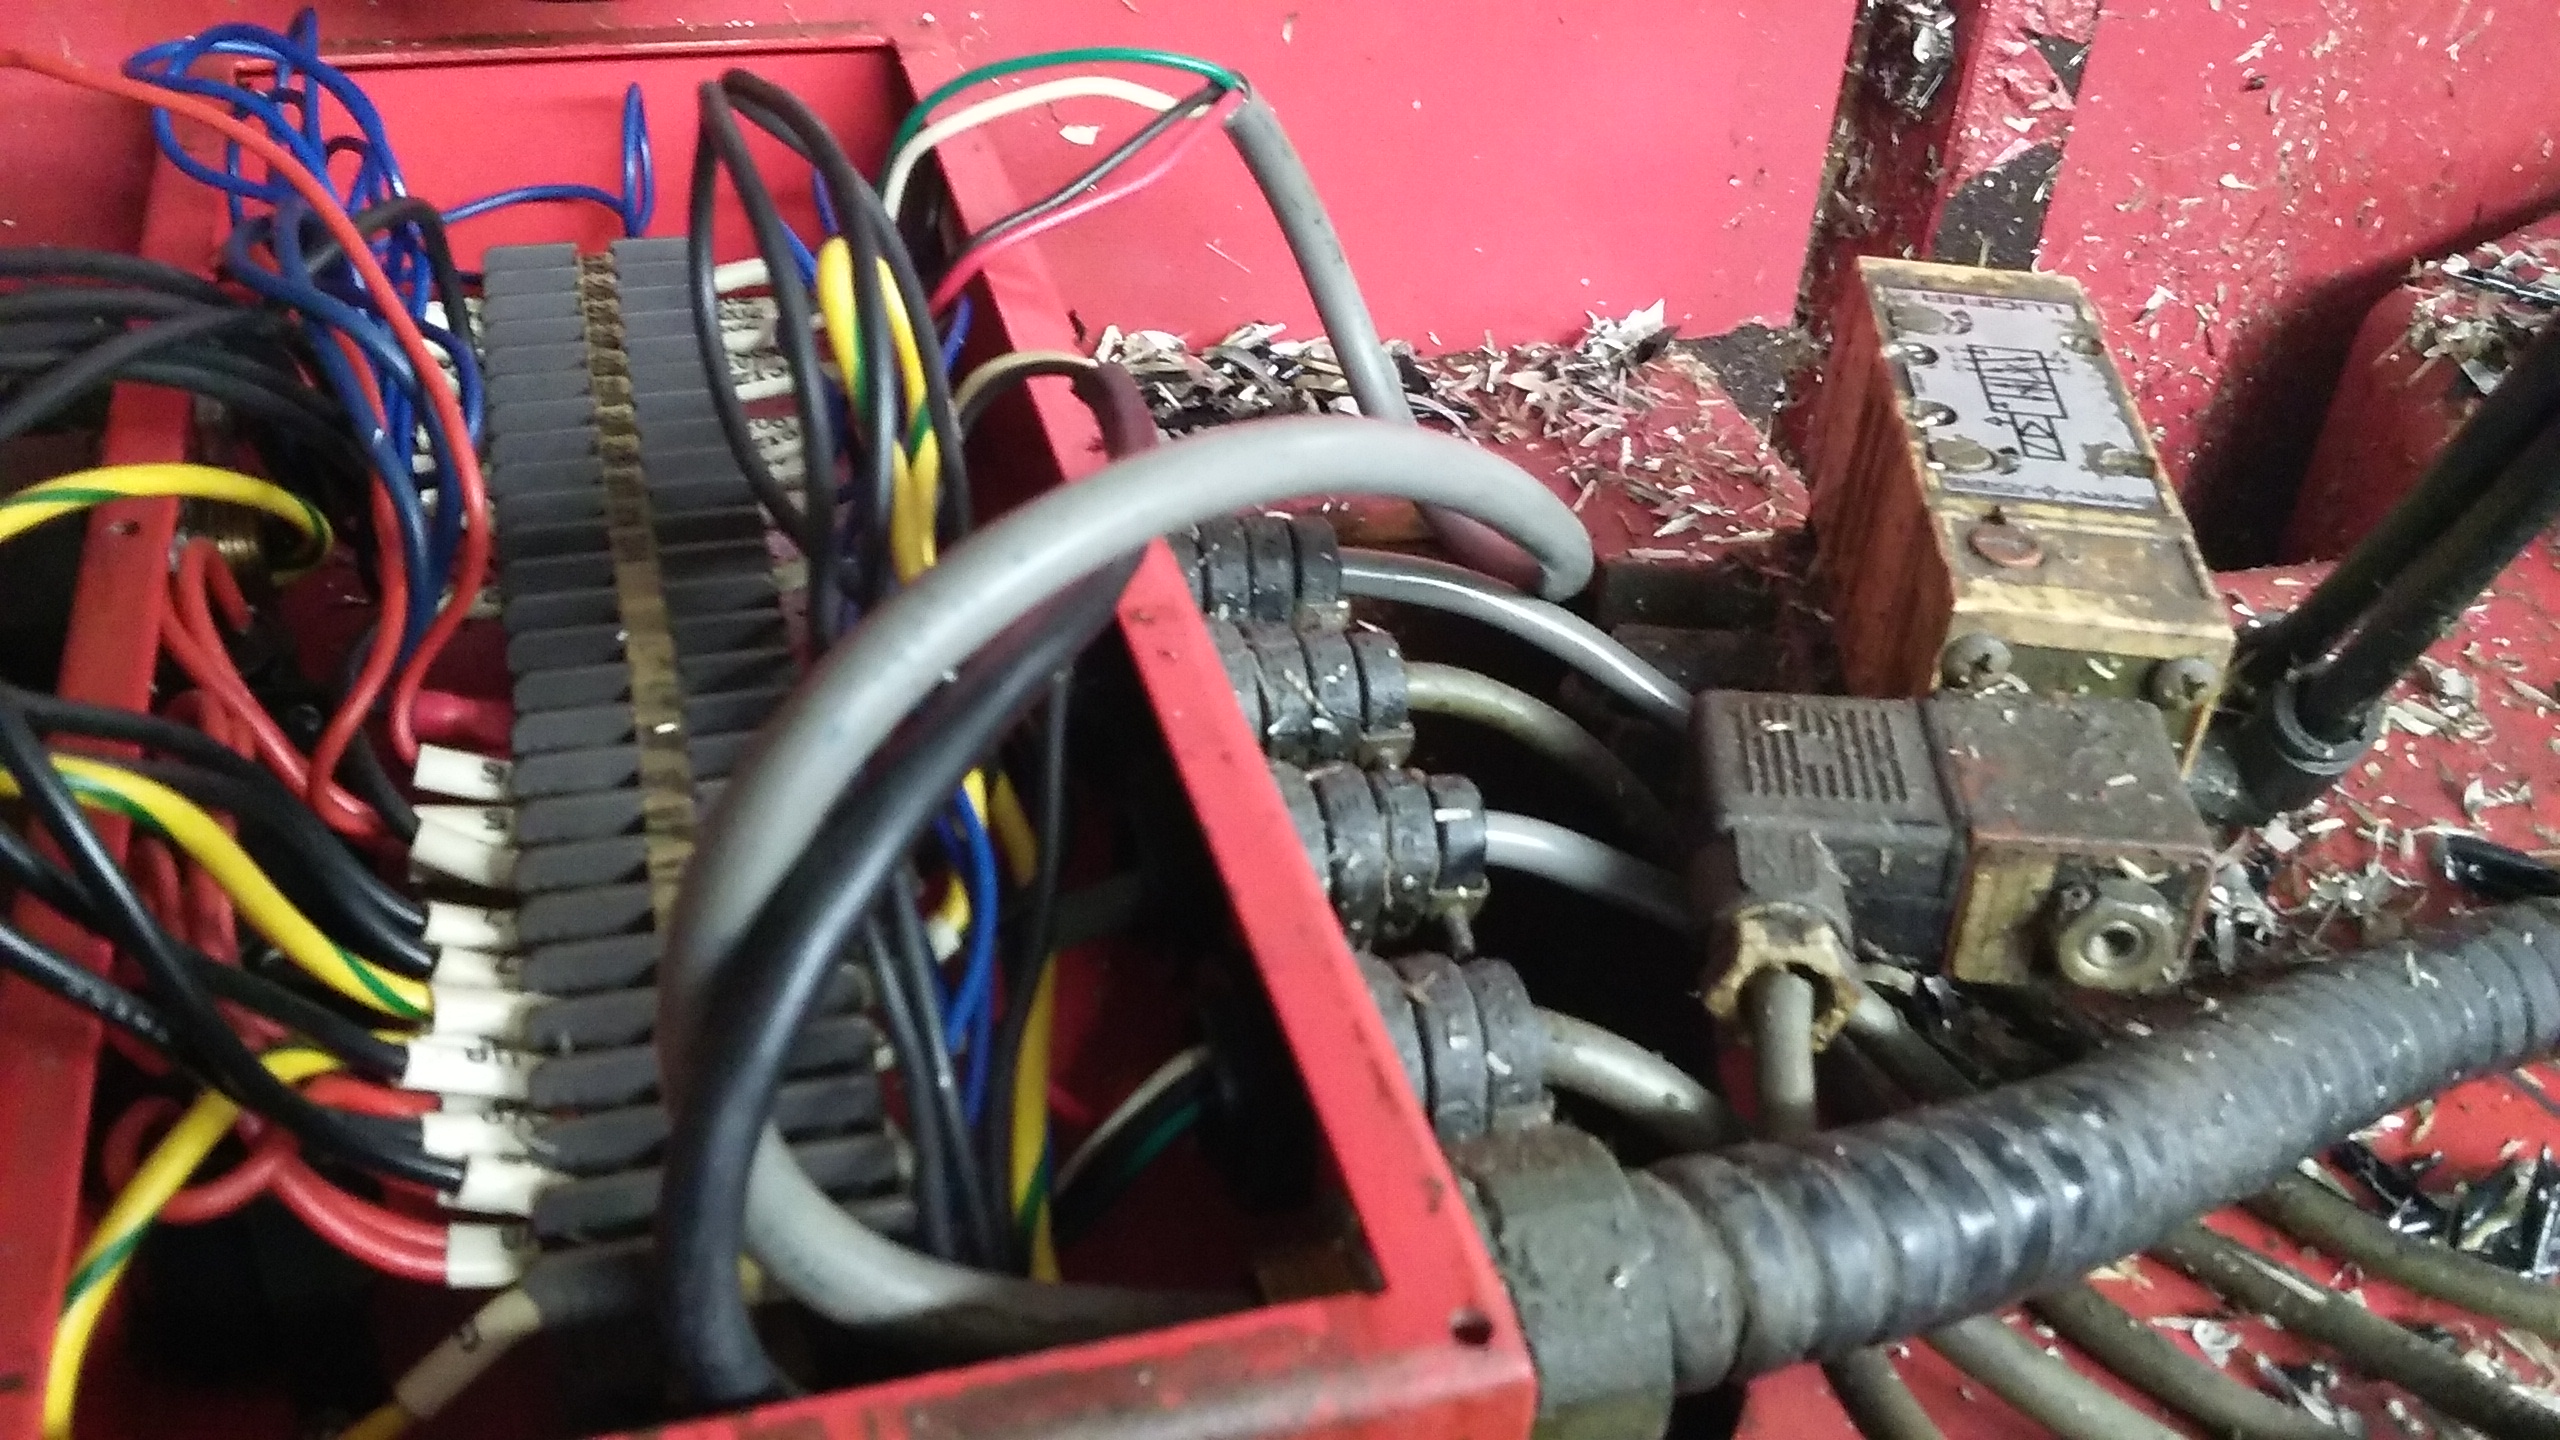
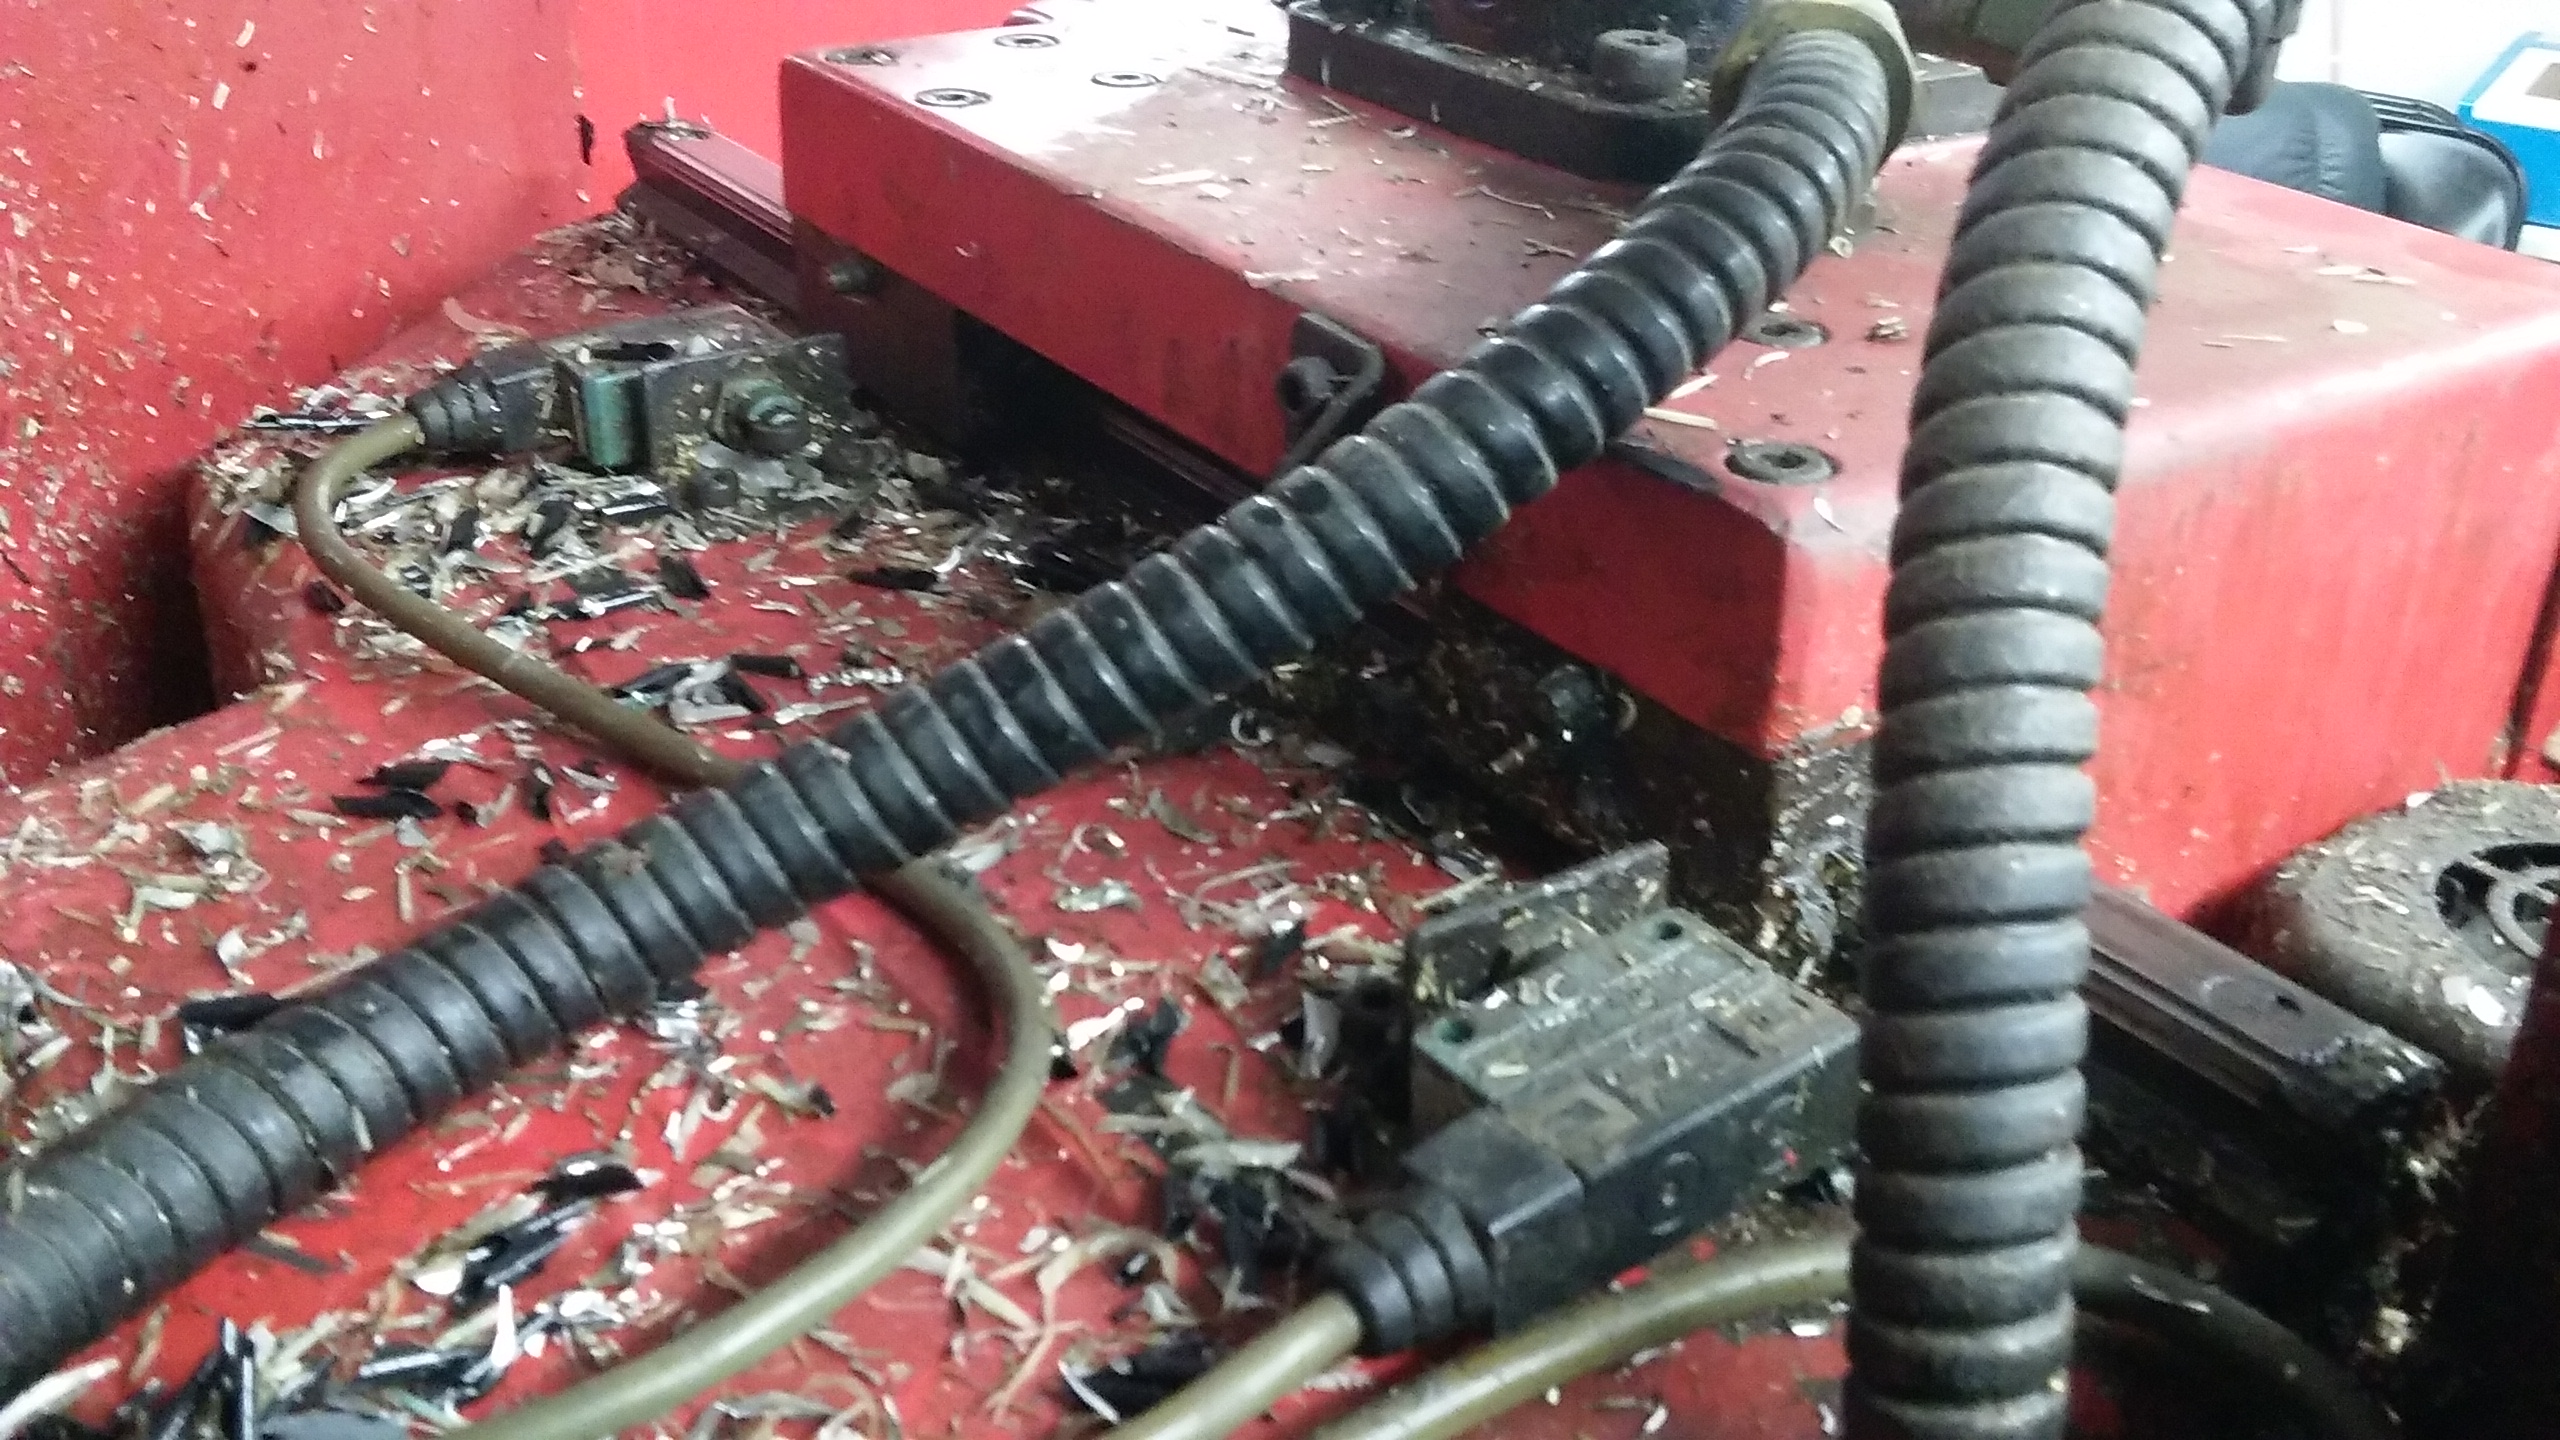
Pneumatic valves for draw bar and taper clean out
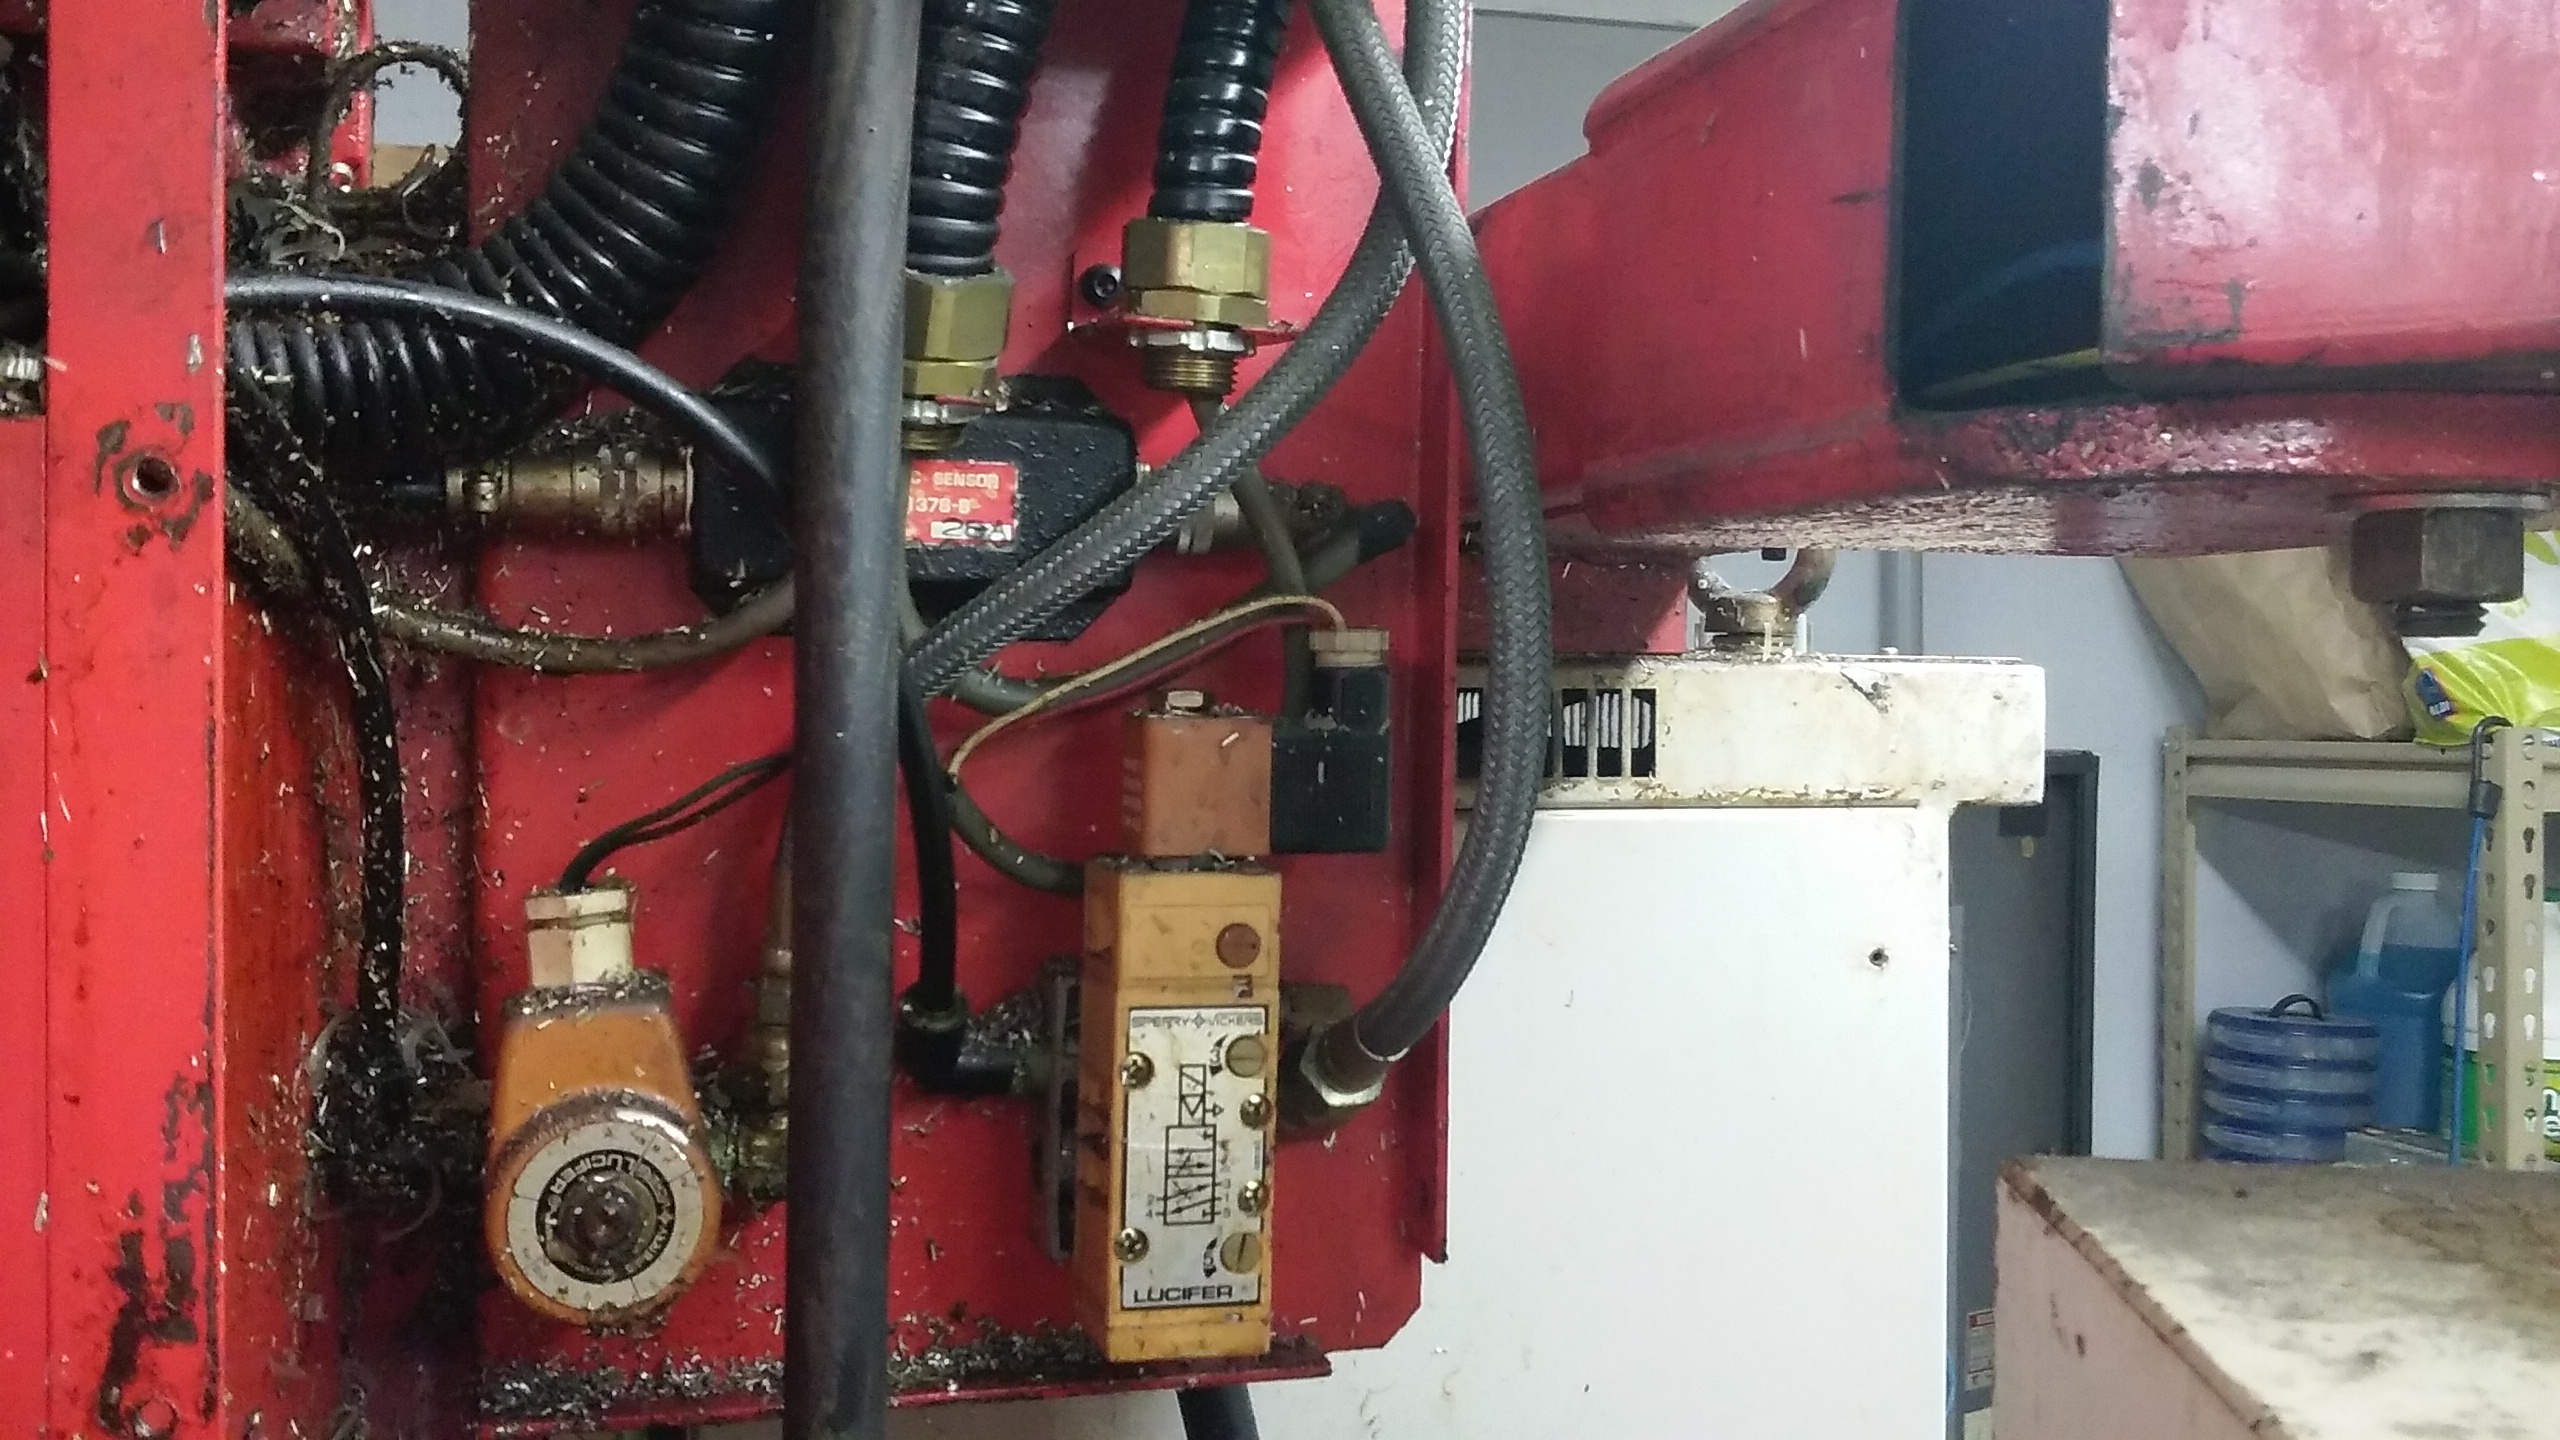
That's all the updates I have for tonight. Hope to dive into the last (4) I/O connections tomorrow night and then start on the classic ladder.
Draw bar limits
Tool magazine up and down limits
Tool magazine in and out limits
Connection points for the tool magazine CW and CCW. The limits are under the magazine
Junction box for all tool magazine limits, power, and goofy light. Also note the pneumatic valve for magazine down
Pneumatic valves for draw bar and taper clean out
That's all the updates I have for tonight. Hope to dive into the last (4) I/O connections tomorrow night and then start on the classic ladder.
The following user(s) said Thank You: johnmc1
Please Log in or Create an account to join the conversation.
- johnmc1
- Offline
- Senior Member
-

Less
More
- Posts: 78
- Thank you received: 21
14 Feb 2017 10:41 #87948
by johnmc1
Replied by johnmc1 on topic 1982 Matsuura MC-500v Retrofit
Good Day chopper79,
Thanks for sharing your experience and description of your Matsuura mill refit.
This knowledge will be invaluable when I refit my matsuura vertical mill.
Cheers john
Thanks for sharing your experience and description of your Matsuura mill refit.
This knowledge will be invaluable when I refit my matsuura vertical mill.
Cheers john
The following user(s) said Thank You: chopper79
Please Log in or Create an account to join the conversation.
Time to create page: 0.798 seconds